标签归档:php

php

使用pack/unpack打包/解包二进制数据

web开发中,通常使用的API接口协议都是基于HTTP(S)的文本协议,比如JSON或XML。这对于跨编程语言的通信已经没有问题了,但有时候会采用二进制的数据来通信,以便获得更高的性能,比如Apache Thrift、gRPC/Protocol Buffer。各个编程语言都有对应的pack/unpack函数,PHP可以使用pack/unpack函数对数据进行二进制编码/解码,它与Perl的pack函数比较类似。
PHP的pack函数至少需要两个参数,第一个参数为打包格式,第二个参数开始为打包的数据。每个格式化字符后面可以跟字节长度,对应打包一个数据;也可以用*自动匹配所有后面的数据,具体的格式化字符可以参考pack函数页面。来看下面的例子pack.php
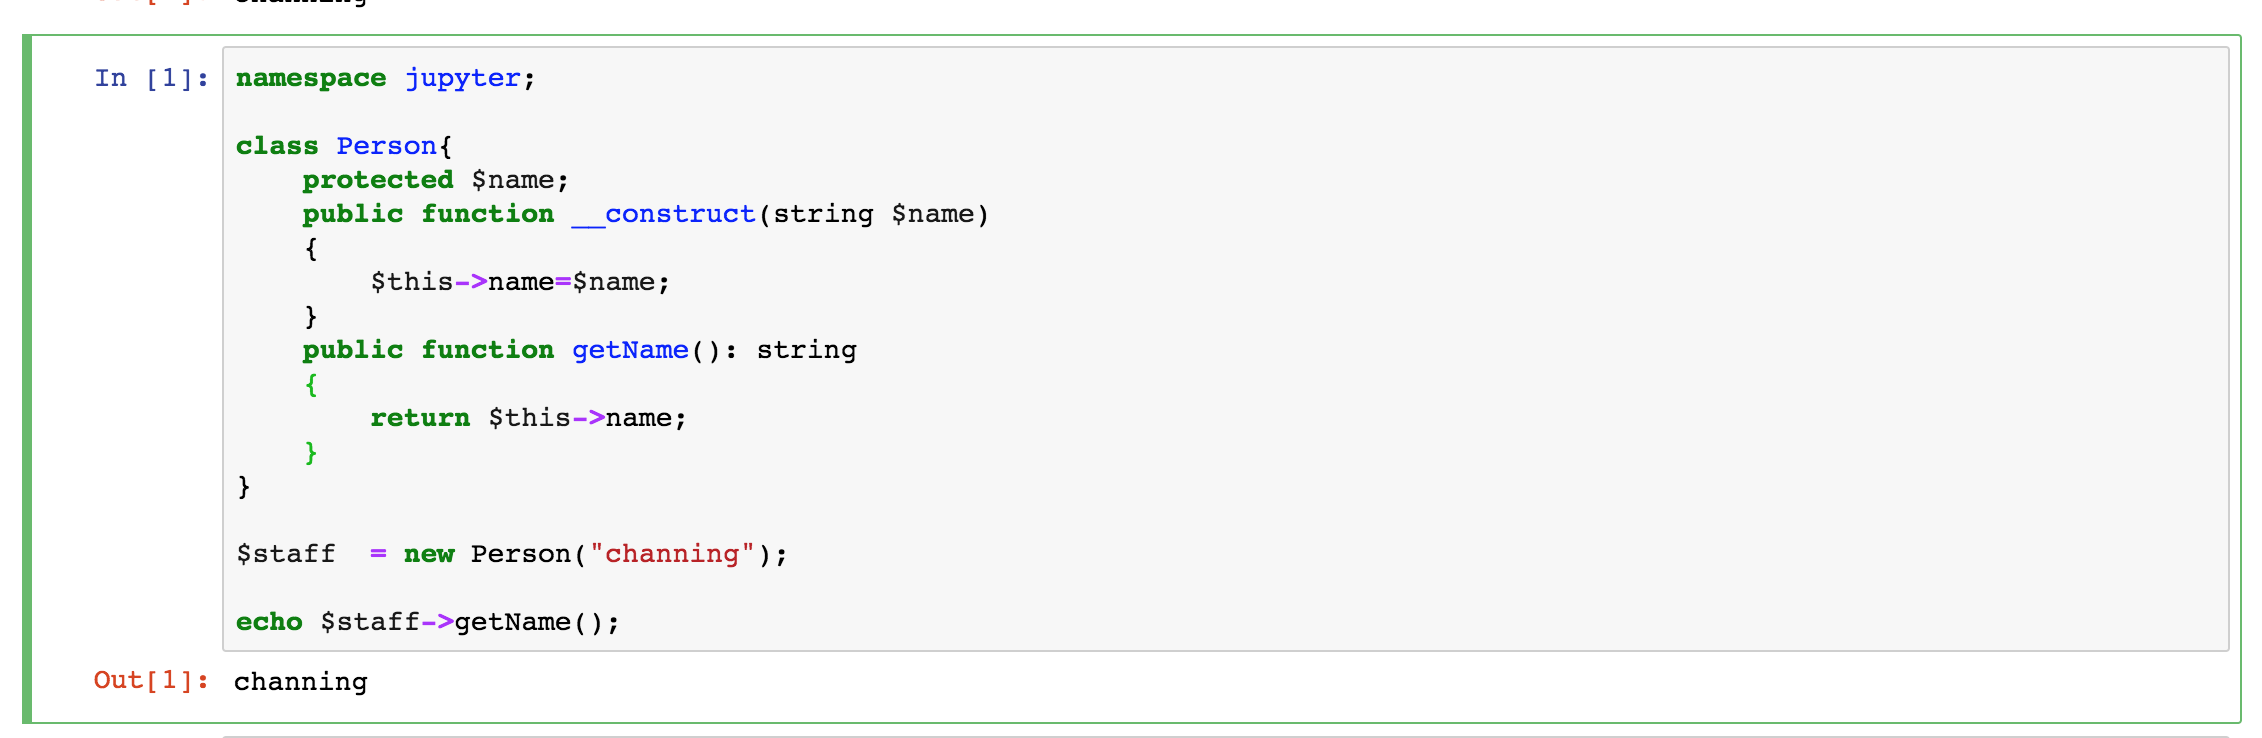
<?php
declare(strict_types=1);

$data = array(
    array(
        'title' => 'C Programming',
        'author' => 'Nuha Ali',
        'subject' => 'C Programming Tutorial',
        'book_id' => 6495407
    ),
    array(
        'title' => 'Telecom Billing',
        'author' => 'Zara Ali',
        'subject' => 'Telecom Billing Tutorial',
        'book_id' => 6495700
    ),
    array(
        'title' => 'PHP Programinng',
        'author' => 'Channing Huang',
        'subject' => 'PHP Programing Tutorial',
        'book_id' => 6495701
    )
);
$fp = \fopen("example","wb");
foreach ($data as $row) {
    $bin = \pack('Z50Z50Z100i', ...\array_values($row));
    \fwrite($fp, $bin);
}
\fclose($fp);

这里有个books数组,每个book包含4个数据:title、author、subject、bookid,对应的格式化是Z50、Z50、Z100、i。Z50意思是打包成50的字节的二进制数据,剩余部分使用NULL填充,这个跟使用a50是类似的,如果要用空格填充则格式化字符应该是A50。Z100类似Z50,不过字节长度为100。i的意思是打包成有符号的整型对应C里面的signed integer,占4个字节。所以每个book应该占50+50+100+4=204字节,3个book总占用612字节。查看一下

[vagrant@localhost bin]$ ls -la | grep example
-rw-r--r--. 1 vagrant vagrant   612 Aug 14 02:22 example

使用xxd查看它的二进制内容,确定是使用NULL填充不足部分

[vagrant@localhost bin]$ xxd -b example 
0000000: 01000011 00100000 01010000 01110010 01101111 01100111  C Prog
0000006: 01110010 01100001 01101101 01101101 01101001 01101110  rammin
000000c: 01100111 00000000 00000000 00000000 00000000 00000000  g.....
0000012: 00000000 00000000 00000000 00000000 00000000 00000000  ......
0000018: 00000000 00000000 00000000 00000000 00000000 00000000  ......
000001e: 00000000 00000000 00000000 00000000 00000000 00000000  ......
0000024: 00000000 00000000 00000000 00000000 00000000 00000000  ......
000002a: 00000000 00000000 00000000 00000000 00000000 00000000  ......
0000030: 00000000 00000000 01001110 01110101 01101000 01100001  ..Nuha
0000036: 00100000 01000001 01101100 01101001 00000000 00000000   Ali..
000003c: 00000000 00000000 00000000 00000000 00000000 00000000  ......
0000042: 00000000 00000000 00000000 00000000 00000000 00000000  ......
0000048: 00000000 00000000 00000000 00000000 00000000 00000000  ......
000004e: 00000000 00000000 00000000 00000000 00000000 00000000  ......
0000054: 00000000 00000000 00000000 00000000 00000000 00000000  ......
000005a: 00000000 00000000 00000000 00000000 00000000 00000000  ......
0000060: 00000000 00000000 00000000 00000000 01000011 00100000  ....C 
0000066: 01010000 01110010 01101111 01100111 01110010 01100001  Progra
000006c: 01101101 01101101 01101001 01101110 01100111 00100000  mming 
0000072: 01010100 01110101 01110100 01101111 01110010 01101001  Tutori
0000078: 01100001 01101100 00000000 00000000 00000000 00000000  al....
000007e: 00000000 00000000 00000000 00000000 00000000 00000000  ......
0000084: 00000000 00000000 00000000 00000000 00000000 00000000  ......
000008a: 00000000 00000000 00000000 00000000 00000000 00000000  ......
0000090: 00000000 00000000 00000000 00000000 00000000 00000000  ......
0000096: 00000000 00000000 00000000 00000000 00000000 00000000  ......
000009c: 00000000 00000000 00000000 00000000 00000000 00000000  ......
00000a2: 00000000 00000000 00000000 00000000 00000000 00000000  ......
00000a8: 00000000 00000000 00000000 00000000 00000000 00000000  ......
00000ae: 00000000 00000000 00000000 00000000 00000000 00000000  ......
00000b4: 00000000 00000000 00000000 00000000 00000000 00000000  ......
00000ba: 00000000 00000000 00000000 00000000 00000000 00000000  ......
00000c0: 00000000 00000000 00000000 00000000 00000000 00000000  ......
00000c6: 00000000 00000000 10101111 00011100 01100011 00000000  ....c.
00000cc: 01010100 01100101 01101100 01100101 01100011 01101111  Teleco
00000d2: 01101101 00100000 01000010 01101001 01101100 01101100  m Bill
00000d8: 01101001 01101110 01100111 00000000 00000000 00000000  ing...
00000de: 00000000 00000000 00000000 00000000 00000000 00000000  ......
00000e4: 00000000 00000000 00000000 00000000 00000000 00000000  ......
00000ea: 00000000 00000000 00000000 00000000 00000000 00000000  ......
00000f0: 00000000 00000000 00000000 00000000 00000000 00000000  ......
00000f6: 00000000 00000000 00000000 00000000 00000000 00000000  ......
00000fc: 00000000 00000000 01011010 01100001 01110010 01100001  ..Zara
0000102: 00100000 01000001 01101100 01101001 00000000 00000000   Ali..
0000108: 00000000 00000000 00000000 00000000 00000000 00000000  ......
000010e: 00000000 00000000 00000000 00000000 00000000 00000000  ......
0000114: 00000000 00000000 00000000 00000000 00000000 00000000  ......
000011a: 00000000 00000000 00000000 00000000 00000000 00000000  ......
0000120: 00000000 00000000 00000000 00000000 00000000 00000000  ......
0000126: 00000000 00000000 00000000 00000000 00000000 00000000  ......
000012c: 00000000 00000000 00000000 00000000 01010100 01100101  ....Te
0000132: 01101100 01100101 01100011 01101111 01101101 00100000  lecom 
0000138: 01000010 01101001 01101100 01101100 01101001 01101110  Billin
000013e: 01100111 00100000 01010100 01110101 01110100 01101111  g Tuto
0000144: 01110010 01101001 01100001 01101100 00000000 00000000  rial..
000014a: 00000000 00000000 00000000 00000000 00000000 00000000  ......
0000150: 00000000 00000000 00000000 00000000 00000000 00000000  ......
0000156: 00000000 00000000 00000000 00000000 00000000 00000000  ......
000015c: 00000000 00000000 00000000 00000000 00000000 00000000  ......
0000162: 00000000 00000000 00000000 00000000 00000000 00000000  ......
0000168: 00000000 00000000 00000000 00000000 00000000 00000000  ......
000016e: 00000000 00000000 00000000 00000000 00000000 00000000  ......
0000174: 00000000 00000000 00000000 00000000 00000000 00000000  ......
000017a: 00000000 00000000 00000000 00000000 00000000 00000000  ......
0000180: 00000000 00000000 00000000 00000000 00000000 00000000  ......
0000186: 00000000 00000000 00000000 00000000 00000000 00000000  ......
000018c: 00000000 00000000 00000000 00000000 00000000 00000000  ......
0000192: 00000000 00000000 11010100 00011101 01100011 00000000  ....c.
0000198: 01010000 01001000 01010000 00100000 01010000 01110010  PHP Pr
000019e: 01101111 01100111 01110010 01100001 01101101 01101001  ogrami
00001a4: 01101110 01101110 01100111 00000000 00000000 00000000  nng...
00001aa: 00000000 00000000 00000000 00000000 00000000 00000000  ......
00001b0: 00000000 00000000 00000000 00000000 00000000 00000000  ......
00001b6: 00000000 00000000 00000000 00000000 00000000 00000000  ......
00001bc: 00000000 00000000 00000000 00000000 00000000 00000000  ......
00001c2: 00000000 00000000 00000000 00000000 00000000 00000000  ......
00001c8: 00000000 00000000 01000011 01101000 01100001 01101110  ..Chan
00001ce: 01101110 01101001 01101110 01100111 00100000 01001000  ning H
00001d4: 01110101 01100001 01101110 01100111 00000000 00000000  uang..
00001da: 00000000 00000000 00000000 00000000 00000000 00000000  ......
00001e0: 00000000 00000000 00000000 00000000 00000000 00000000  ......
00001e6: 00000000 00000000 00000000 00000000 00000000 00000000  ......
00001ec: 00000000 00000000 00000000 00000000 00000000 00000000  ......
00001f2: 00000000 00000000 00000000 00000000 00000000 00000000  ......
00001f8: 00000000 00000000 00000000 00000000 01010000 01001000  ....PH
00001fe: 01010000 00100000 01010000 01110010 01101111 01100111  P Prog
0000204: 01110010 01100001 01101101 01101001 01101110 01100111  raming
000020a: 00100000 01010100 01110101 01110100 01101111 01110010   Tutor
0000210: 01101001 01100001 01101100 00000000 00000000 00000000  ial...
0000216: 00000000 00000000 00000000 00000000 00000000 00000000  ......
000021c: 00000000 00000000 00000000 00000000 00000000 00000000  ......
0000222: 00000000 00000000 00000000 00000000 00000000 00000000  ......
0000228: 00000000 00000000 00000000 00000000 00000000 00000000  ......
000022e: 00000000 00000000 00000000 00000000 00000000 00000000  ......
0000234: 00000000 00000000 00000000 00000000 00000000 00000000  ......
000023a: 00000000 00000000 00000000 00000000 00000000 00000000  ......
0000240: 00000000 00000000 00000000 00000000 00000000 00000000  ......
0000246: 00000000 00000000 00000000 00000000 00000000 00000000  ......
000024c: 00000000 00000000 00000000 00000000 00000000 00000000  ......
0000252: 00000000 00000000 00000000 00000000 00000000 00000000  ......
0000258: 00000000 00000000 00000000 00000000 00000000 00000000  ......
000025e: 00000000 00000000 11010101 00011101 01100011 00000000  ....c.

PHP的unpack函数有三个参数,第一个为解包的格式化字符,第二个为打包过的数据,第三个为起始偏移量。解包后返回一个关联数组,可以在解包的格式化字符串后面跟对应的key。

<?php
declare(strict_types=1);

$fp = \fopen("example","rb");
while (!\feof($fp)) {
    $data = \fread($fp,204);
    if($data) {
        $arr = \unpack("Z50title/Z50author/Z100subject/ibook_id",$data);
        foreach ($arr as $key => $value) {
            echo $key. "->" . $value.PHP_EOL;
        }
        echo PHP_EOL;
    }
}
\fclose($fp);

这样就可以读取对应的二进制文件,并正确解析出来。
不同的编程语言都可以对二进制文件进行读写。比如C语言里面打包上面的数据

#include<stdio.h>
#include<stdlib.h>

struct book {
   char  title[50];
   char  author[50];
   char  subject[100];
   int   id;
};
 
 int main()
 {
     FILE *fp;
     struct book books[3] = {
         {"C Programming", "Nuha Ali", "C Programming Tutorial", 6495407},
         {"Telecom Billing", "Zara Ali", "Telecom Billing Tutorial", 6495700},
         {"PHP Programinng", "Channing Huang", "PHP Programing Tutorial", 6495701}
    };
    fp = fopen("newbook", "wb");
 
    if(fp == NULL)
    {
        printf("Error opening file\n");
        exit(1);
    }
    printf("sizeof books %10lu\n", sizeof(books));
    printf("sizeof book struct %10lu\n", sizeof(struct book));
    printf("sizeof book1 title %10lu\n", sizeof(books[0].title));
    printf("sizeof book1 author %10lu\n", sizeof(books[0].author));
    printf("sizeof book1 subject %10lu\n", sizeof(books[0].subject));
    printf("sizeof book1 id %10lu\n", sizeof(books[0].id));
    fwrite(books, sizeof(books), 1, fp);
    fclose(fp);
    return 0;
 }
 

编译运行一下

[vagrant@localhost bin]$ gcc -o pack pack.c
[vagrant@localhost bin]$ ./pack
sizeof books        612
sizeof book struct        204
sizeof book1 title         50
sizeof book1 author         50
sizeof book1 subject        100
sizeof book1 id          4
[vagrant@localhost bin]$ ls -lah | grep newbook
-rw-r--r--. 1 vagrant vagrant  612 Aug 14 02:50 newbook

可以看到生成的文件大小与上面的一样,使用xxd查看的内容也跟上面的一样,并且可以使用unpak.php解析。类似的也可以用C来解析PHP打包的二进制数据

#include<stdio.h>
#include<stdlib.h>

struct book {
   char  title[50];
   char  author[50];
   char  subject[100];
   int   id;
};
 
 int main()
 {
     int i;
     FILE *fp;
     struct book Book;
     fp = fopen("example", "rb");
 
    if(fp == NULL)
    {
        printf("Error opening file\n");
        exit(1);
    }
    for (i=0;i<3; i++)
    {
        fread(&Book,sizeof(struct book),1,fp);
        printf( "Book title : %s\n", Book.title);
        printf( "Book author : %s\n", Book.author);
        printf( "Book subject : %s\n", Book.subject);
        printf( "Book book_id : %d\n", Book.id);
    }
    fclose(fp);
    return 0;
 }
 

编译运行一下

[vagrant@localhost bin]$ gcc -o unpack unpack.c
[vagrant@localhost bin]$ ./unpack
Book title : C Programming
Book author : Nuha Ali
Book subject : C Programming Tutorial
Book book_id : 6495407
Book title : Telecom Billing
Book author : Zara Ali
Book subject : Telecom Billing Tutorial
Book book_id : 6495700
Book title : PHP Programinng
Book author : Channing Huang
Book subject : PHP Programing Tutorial
Book book_id : 6495701

这里使用C的struct定义打包解包数据,这里面有两个问题:字节对齐NULL填充。字节对齐会导致生成的二进制文件大小与结构体里面定义的不一样,比如将title改为40个字节,整个book预计占用194字节,实际占用196字节(4的倍数),编译器自动填充了2个字节到title后面。所以要注意数据结构体的设计,避免过多对齐浪费。C语言的字符串其实是字符数组加上NUL结束符(\0),像上面那样初始化字符串是编译器默认填充的是NUL,但如果声明时没有初始化而是在后面赋值,比如strcpy,则可能在NUL后面填充非NUL值,导致在PHP解析出这些不必要的字符,显示不准确,这也是为什么在PHP里面解析时我们使用Z而不是A解析符的原因,它在碰到NUL便返回,不管后面填充的内容了。可以使用memset手动填充不足部分为’\0’,这样子就可以保证剩余部分全为NULL了。
对于unsigned short,unsigned long,float,double还有大端序、小端序,字节顺序可以参考这里。通常网络设备传输的字节序为大端序,而大部分CPU(x86)处理的字节序为小端序。这里只要通信双方沟通统一使用大端序或小端序即可,不需要关心传输过程中的自动转换。比如在PHP里面发送一个数字(4字节)和8个字符(8字节)

<?php
declare(strict_types=1);

$host = "127.0.0.1";
$port = 9872;

$socket = \socket_create(AF_INET, SOCK_STREAM, SOL_TCP)
  or die("Unable to create socket\n");

@\socket_connect($socket, $host, $port) or die("Connect error.\n");

if ($err = \socket_last_error($socket))
{

  \socket_close($socket);
  die(\socket_strerror($err) . "\n");
}

$binarydata = \pack("Na8", "256", "Channing");
echo \bin2hex($binarydata).PHP_EOL;
$len = \socket_write ($socket , $binarydata, strlen($binarydata));
\socket_close($socket);

PHP里面数字的格式化字符是N,即采用大端序32位编码。在GO里面接收,使用大端序解析位数字

package main

import (
	"fmt"
	"net"
	"encoding/binary"
)

const BUF_SIZE = 12

func handleConnection(conn net.Conn) {
	defer conn.Close()
	buf := make([]byte, BUF_SIZE)
	n, err := conn.Read(buf)

	if err != nil {
		fmt.Printf("err: %v\n", err)
		return
	}

	//fmt.Printf("\nreceive:%d bytes,data:%x, %s\n", n, buf[:4], buf[4:])
	fmt.Printf("\nreceive:%d bytes,data:%d, %s\n", n, binary.BigEndian.Uint32(buf[:4]), buf[4:])
}

func main() {
	ln, err := net.Listen("tcp", ":9872")

	if err != nil {
		fmt.Printf("error: %v\n", err)
		return
	}

	for {
		conn, err := ln.Accept()
		if err != nil {
			continue
		}
		go handleConnection(conn)
	}
}

运行recieve.go 和 send.php,可以正常收发

[root@localhost bin]$ php send.php
000001004368616e6e696e67


[root@localhost bin]$ go run receive.go 

receive:12 bytes,data:256, Channing

如果在PHP里面使用了不匹配的格式化符号,比如i或者n,GO里面将解析错误。这里也可以采用小端序编码和解析。
pack后的二进制数据可以使用bin2hex转换为16进制查看,使用chr转换单个字节为可读性字符。
通常我们读写的是文本文件,这里读写的是二进制文件,文本文件到二进制文件有个编码过程,比如ASCII、UTF-8。其实文本文件,图片文件,都是二进制文件,都可以使用xxd查看,只不过特定软件能够解析(解码)对应的二进制字节数据。使用xxd查看时,它只能现显示ASCII可打印字符,不能显示的用点号表示。

参考链接:
Apache Thrift – 可伸缩的跨语言服务开发框架
Google Protocol Buffer 的使用和原理
高效的数据压缩编码方式 Protobuf
PHP: 深入pack/unpack
C Programming Files I/O
Unpacking binary data in PHP
大端和小端(Big endian and Little endian)
PHP RPC开发之Thrift

Jupyter Notebook

对于编程初学者,如果有一个开箱即用的环境,比如web页面,就可以进行编程交互,那是极友好。有时候我们想在远程服务器上执行一些脚本,输出一些结果,比如科学计算;有时候又想在服务器上执行一些命令但又不能直接登录服务器,如果能够在web界面上操作或作为跳板机,那也是极友好的。Jupyter Notebook是基于IPython的一个基于web交互执行的在线环境,支持Python,也支持其他编程语言,比如Julia和R。所创建Notebook文档可以自动保存执行过的代码、结果,方便进行回放。
Jupyter Notebok的安装很方便,可以使用Anaconda来安装,或者手动安装。Python3下手动安装,

pip3 install jupyter
export PATH=$PATH:/usr/local/python3/bin

查看一下

[root@localhost local]# pip3 show jupyter
Name: jupyter
Version: 1.0.0
Summary: Jupyter metapackage. Install all the Jupyter components in one go.
Home-page: http://jupyter.org
Author: Jupyter Development Team
Author-email: [email protected]
License: BSD
Location: /usr/local/python3/lib/python3.7/site-packages
Requires: jupyter-console, notebook, ipywidgets, nbconvert, qtconsole, ipykernel
Required-by: 

如果直接运行jupyter notebook,那么会生成一个本地可以访问的带token的url,每次都不一样,不是很方便。设置密码,以便登录

[root@localhost opt]# jupyter notebook password
Enter password: 
Verify password: 
[NotebookPasswordApp] Wrote hashed password to /root/.jupyter/jupyter_notebook_config.json
[root@localhost bin]# cat /root/.jupyter/jupyter_notebook_config.json 
{
  "NotebookApp": {
    "password": "sha1:e04153005102:961b12eef91987a06b497f915fc3f18c62d8f714"
  }

由于是在虚拟机里面,我们并不需要Jupyter自动打开浏览器,但需要监听来自任意IP的请求,指定端口9030。这里使用root用户运行Jupyter,默认是不允许的:

[root@localhost opt]# jupyter notebook --no-browser --allow-root --ip 0.0.0.0 --port 9030
[I 02:13:44.320 NotebookApp] Serving notebooks from local directory: /opt
[I 02:13:44.320 NotebookApp] The Jupyter Notebook is running at:
[I 02:13:44.320 NotebookApp] http://(localhost.localdomain or 127.0.0.1):9030/
[I 02:13:44.320 NotebookApp] Use Control-C to stop this server and shut down all kernels (twice to skip confirmation).
[I 02:13:59.664 NotebookApp] 302 GET / (192.168.33.1) 1.22ms
[I 02:14:23.597 NotebookApp] Kernel started: 7ad63717-7a65-4dec-9d5a-9af654c28f75
[I 02:14:25.204 NotebookApp] Adapting to protocol v5.1 for kernel 7ad63717-7a65-4dec-9d5a-9af654c28f75
[I 02:14:37.350 NotebookApp] Starting buffering for 7ad63717-7a65-4dec-9d5a-9af654c28f75:ea68853b742c40f8bcf8745529ea95de
[I 02:14:43.735 NotebookApp] Kernel started: 5b569c8d-6936-4bd2-9674-0317c46948f6
[I 02:14:44.124 NotebookApp] Adapting to protocol v5.0 for kernel 5b569c8d-6936-4bd2-9674-0317c46948f6
[2019-06-03 02:14:43] kernel.DEBUG: Connection settings {"processId":6751,"connSettings":{"shell_port":39990,"iopub_port":48184,"stdin_port":40113,"control_port":43426,"hb_port":49075,"ip":"127.0.0.1","key":"d5f89bba-890ecf15e6b20718411170ad","transport":"tcp","signature_scheme":"hmac-sha256","kernel_name":"jupyter-php"},"connUris":{"stdin":"tcp://127.0.0.1:40113","control":"tcp://127.0.0.1:43426","hb":"tcp://127.0.0.1:49075","shell":"tcp://127.0.0.1:39990","iopub":"tcp://127.0.0.1:48184"}} []
[2019-06-03 02:14:44] KernelCore.DEBUG: Initialized sockets {"processId":6751} []

然后打开浏览器,访问http://192.168.33.70:9030,输入账号密码,就可以在web里面运行Python了

Jupyter默认带了SQL扩展,使用ipython-sql来执行,只需要安装对应的驱动,这里使用PyMySQL

python3 -m pip install PyMySQL

然后在Web里面执行就可以了

Jupyter还有其他扩展,参考这里
除了可以执行Python和SQL,Jupyter Notebook也可以支持其他语言,在这里列出了。通常执行方式是通过Bash执行,或者通过ZeroMQ来通信,参考这里实现。一个Jupyter的kernal将需要监听以下几个socket:

  • Shell:执行命令
  • IOPub:推送执行结果
  • Stdin:接收输入
  • Control:接收控制命令,比如关闭、终端
  • Heartbeat:心跳检测
  • 这个思路也可以用来做IOT设备的远程监控,交互执行。
    这里安装一下PHP 7这个kernel,作者甚至还提供了installer,但是首先要安装ZeroMQ以便与Jupyter服务通信

    yum install php-pecl-zmq
    wget https://litipk.github.io/Jupyter-PHP-Installer/dist/jupyter-php-installer.phar
    ./jupyter-php-installer.phar install
    

    查看安装文件

    [root@localhost opt]# ls -la /usr/local/share/jupyter/kernels/
    total 0
    drwxr-xr-x. 4 root root 34 May 10 06:10 .
    drwxr-xr-x. 3 root root 20 May  9 07:30 ..
    drwxr-xr-x. 2 root root 24 May  9 07:30 jupyter-php
    drwxr-xr-x. 2 root root 40 May 10 06:10 lgo
    
    [root@localhost opt]# cat /usr/local/share/jupyter/kernels/jupyter-php/kernel.json 
    {"argv":["php","\/opt\/jupyter-php\/pkgs\/vendor\/litipk\/jupyter-php\/src\/kernel.php","{connection_file}"],"display_name":"PHP","language":"php","env":{}}
    

    这个扩展使用了react/zmq来监听Jupyter请求,使用psysh来交互执行PHP代码。

    如果想要更改Jupyter的web模板,可以在以下目录找到

    [root@localhost vagrant]# ls -la /usr/local/python3/lib/python3.7/site-packages/notebook/templates
    total 92
    drwxr-xr-x.  2 root root  4096 May  9 06:33 .
    drwxr-xr-x. 19 root root  4096 May  9 06:33 ..
    -rw-r--r--.  1 root root   147 May  9 06:33 404.html
    -rw-r--r--.  1 root root   499 May  9 06:33 browser-open.html
    -rw-r--r--.  1 root root  4258 May  9 06:33 edit.html
    -rw-r--r--.  1 root root   856 May  9 06:33 error.html
    -rw-r--r--.  1 root root  4256 May  9 06:33 login.html
    -rw-r--r--.  1 root root  1179 May  9 06:33 logout.html
    -rw-r--r--.  1 root root 23162 May  9 06:33 notebook.html
    -rw-r--r--.  1 root root  6559 May  9 06:33 page.html
    -rw-r--r--.  1 root root  1089 May  9 06:33 terminal.html
    -rw-r--r--.  1 root root 12130 May  9 06:33 tree.html
    -rw-r--r--.  1 root root   544 May  9 06:33 view.html
    

    Jupyter Notebook Web前端采用WebSocket与服务器交互,服务器接收消息并转发给对应的kernel执行或控制,并将结果推送给前端。Jupyter Notebook也可以直接打开Terminal,在远程服务器上执行命令。注意这里的用户就是刚才运行jupyter的用户

    许多web terminal也都是采用WebSocket来做交互,比如xterm.jswebtty
    Juypter Notebook适合单用户(单机)使用,如果提供多用户使用(比如教学),可以使用Jupyter Hub,可以使用docker快捷部署。

    参考链接:
    Jupyter Notebook Extensions
    Jupyter – How do I decide which packages I need?
    PsySH——PHP交互式控制台
    Jupyter项目
    WebSocket 教程

    Let’s encrypt

    最近域名主机双双到期了,原来的服务商建议域名迁出,于是转移到了Godaddy,过程很顺利。主机迁到了linode,一个是因为它便宜,另一个是因为想给自己的网站加个SSL证书。
    首先是服务器环境Apache, PHP, MaraiDB(MySQL)的配置。 linode 创建主机很简单,点点就好了,然后可以去启动机器,设置SSH访问。

    yum update
    yum install httpd php php-cli php-mbstring php-pdo php-mysql php-gd php-tidy
    

    启动Apache

    systemctl start httpd.service
    systemctl enable httpd.service
    

    然后直接访问你的服务器ip,可以看到默认的欢迎界面

    ip addr show eth0 | grep inet | awk '{ print $2; }' | sed 's/\/.*$//'
    curl 1.139.x.x
    

    CentOS 7目前默认不提供Mysql Server,而是Mariadb。MySQL的命令行仍然可以使用并兼容, PHP仍然可以使用PDO及MySQL扩展访问它。

    yum install mariadb-server mariadb
    systemctl start mariadb
    

    然后设置管理员密码及安全设置

    mysql_secure_installation
    

    开机启动Mariadb服务

    systemctl enable mariadb.service
    

    可以在/var/www/html目录下创建一个测试脚本来验证安装情况

    <?php
    phpinfo();
    

    WordPress则是从原本的数据库全部导出,文件全部打包回来。
    在Linode上创建对应的数据库,用户及导入脚本

    MariaDB [(none)]> CREATE database courages_wordpress;
    
    MariaDB [(none)]> CREATE USER courages_wp IDENTIFIED BY '*************';
    
    MariaDB [(none)]> grant all privileges on courages_wordpress.* to courages_wp@localhost identified by '*************';
    

    导入数据库

    mysql -uroot -p courages_wordpress < /tmp/wordpress.sql
    

    将文件解压并复制到/var/www/html目录

    tar -xzvf backup.tar.gz
    cp -R backup/public_html/* /var/www/html/*
    chown -R apache:apache /var/www/html
    

    更改Apache设置AllowOverride 为all,以便支持WordPress的链接重定向。

    vim /etc/httpd/conf/httpd.conf
    
    <Directory "/var/www/html">
        #
        # Possible values for the Options directive are "None", "All",
        # or any combination of:
        #   Indexes Includes FollowSymLinks SymLinksifOwnerMatch ExecCGI MultiViews
        #
        # Note that "MultiViews" must be named *explicitly* --- "Options All"
        # doesn't give it to you.
        #
        # The Options directive is both complicated and important.  Please see
        # http://httpd.apache.org/docs/2.4/mod/core.html#options
        # for more information.
        #
        Options Indexes FollowSymLinks
    
        #
        # AllowOverride controls what directives may be placed in .htaccess files.
        # It can be "All", "None", or any combination of the keywords:
        #   Options FileInfo AuthConfig Limit
        #
        AllowOverride All
    
        #
        # Controls who can get stuff from this server.
        #
        Require all granted
    </Directory>
    

    重启Apache

    systemctl restart httpd.service
    

    在linode的DNS manager那里新增一个新的domain,在服务器列表里面选中对应的服务器就可以了,然后就可以看到对应的域名解析信息。
    域名转移会要求一个key,从原注册商那里解锁并获得,在Godday输入Key后,它会发邮件与你确认,然后将DNS域名服务器改为linode的域名服务器就好了。

    Let’s Encrypt提供免费90天的SSL证书,如果证书到期了就需要再次更新下。如果你有shell权限,它推荐使用Cerbot来安装和更新证书。CentOS 7 + Apache的安装非常简单。首先安装EPEL源,要不然找不到对应的安装包

    yum install epel-release
    yum install certbot-apache
    certbot --authenticator webroot --installer apache
    

    设置一下域名,网站目录及域名重定向

    Saving debug log to /var/log/letsencrypt/letsencrypt.log
    Plugins selected: Authenticator webroot, Installer apache
    Enter email address (used for urgent renewal and security notices) (Enter 'c' to
    cancel): <[email protected]>
    Starting new HTTPS connection (1): acme-v01.api.letsencrypt.org
    
    -------------------------------------------------------------------------------
    Please read the Terms of Service at
    https://letsencrypt.org/documents/LE-SA-v1.2-November-15-2017.pdf. You must
    agree in order to register with the ACME server at
    https://acme-v01.api.letsencrypt.org/directory
    -------------------------------------------------------------------------------
    (A)gree/(C)ancel: A
    
    -------------------------------------------------------------------------------
    Would you be willing to share your email address with the Electronic Frontier
    Foundation, a founding partner of the Let's Encrypt project and the non-profit
    organization that develops Certbot? We'd like to send you email about EFF and
    our work to encrypt the web, protect its users and defend digital rights.
    -------------------------------------------------------------------------------
    (Y)es/(N)o: Y
    Starting new HTTPS connection (1): supporters.eff.org
    No names were found in your configuration files. Please enter in your domain
    name(s) (comma and/or space separated)  (Enter 'c' to cancel): courages.us
    Obtaining a new certificate
    Performing the following challenges:
    http-01 challenge for courages.us
    Input the webroot for courages.us: (Enter 'c' to cancel): /var/www/html
    Waiting for verification...
    Cleaning up challenges
    
    We were unable to find a vhost with a ServerName or Address of courages.us.
    Which virtual host would you like to choose?
    (note: conf files with multiple vhosts are not yet supported)
    -------------------------------------------------------------------------------
    1: ssl.conf                       |                       | HTTPS | Enabled
    -------------------------------------------------------------------------------
    Press 1 [enter] to confirm the selection (press 'c' to cancel): 1
    Deploying Certificate for courages.us to VirtualHost /etc/httpd/conf.d/ssl.conf
    
    Please choose whether or not to redirect HTTP traffic to HTTPS, removing HTTP access.
    -------------------------------------------------------------------------------
    1: No redirect - Make no further changes to the webserver configuration.
    2: Redirect - Make all requests redirect to secure HTTPS access. Choose this for
    new sites, or if you're confident your site works on HTTPS. You can undo this
    change by editing your web server's configuration.
    -------------------------------------------------------------------------------
    Select the appropriate number [1-2] then [enter] (press 'c' to cancel): 2
    Created redirect file: le-redirect-courages.us.conf
    Rollback checkpoint is empty (no changes made?)
    
    -------------------------------------------------------------------------------
    Congratulations! You have successfully enabled https://courages.us
    
    You should test your configuration at:
    https://www.ssllabs.com/ssltest/analyze.html?d=courages.us
    -------------------------------------------------------------------------------
    

    在浏览器访问一下域名即有小绿钥匙。可以在/etc/httpd/conf.d/ssl.conf查看相应的SSL证书配置

    <VirtualHost _default_:443>
    ServerName courages.us
    SSLCertificateFile /etc/letsencrypt/live/courages.us/cert.pem
    SSLCertificateKeyFile /etc/letsencrypt/live/courages.us/privkey.pem
    Include /etc/letsencrypt/options-ssl-apache.conf
    SSLCertificateChainFile /etc/letsencrypt/live/courages.us/chain.pem
    </VirtualHost>
    

    由于证书在90天后即将失效,可以加入crontab自动更新

    certbot renew --dry-run
    crontab -e
    
    0 0,12 * * * python -c 'import random; import time; time.sleep(random.random() * 3600)' && certbot renew 
    

    另外一种更新证书的方法是使用acme.sh,不依赖python,同样支持DNS验证,并且还可以获取其他CA颁发的证书,比如ZeroSSL
    安装acme。sh脚本非常简单

    ➜ ~ curl https://get.acme.sh | sh -s [email protected]
    % Total % Received % Xferd Average Speed Time Time Time Current
    Dload Upload Total Spent Left Speed
    100 1032 0 1032 0 0 608 0 --:--:-- 0:00:01 --:--:-- 608
    % Total % Received % Xferd Average Speed Time Time Time Current
    Dload Upload Total Spent Left Speed
    100 216k 100 216k 0 0 104k 0 0:00:02 0:00:02 --:--:-- 104k
    [2023年 04月 07日 星期五 22:11:22 CST] Installing from online archive.
    [2023年 04月 07日 星期五 22:11:22 CST] Downloading https://github.com/acmesh-official/acme.sh/archive/master.tar.gz
    [2023年 04月 07日 星期五 22:11:25 CST] Extracting master.tar.gz
    [2023年 04月 07日 星期五 22:11:26 CST] It is recommended to install socat first.
    [2023年 04月 07日 星期五 22:11:26 CST] We use socat for standalone server if you use standalone mode.
    [2023年 04月 07日 星期五 22:11:26 CST] If you don't use standalone mode, just ignore this warning.
    [2023年 04月 07日 星期五 22:11:26 CST] Installing to /root/.acme.sh
    [2023年 04月 07日 星期五 22:11:26 CST] Installed to /root/.acme.sh/acme.sh
    [2023年 04月 07日 星期五 22:11:26 CST] Installing alias to '/root/.zshrc'
    [2023年 04月 07日 星期五 22:11:26 CST] OK, Close and reopen your terminal to start using acme.sh
    [2023年 04月 07日 星期五 22:11:26 CST] Installing alias to '/root/.cshrc'
    [2023年 04月 07日 星期五 22:11:26 CST] Installing alias to '/root/.tcshrc'
    [2023年 04月 07日 星期五 22:11:26 CST] Installing cron job
    [2023年 04月 07日 星期五 22:11:26 CST] Good, bash is found, so change the shebang to use bash as preferred.
    [2023年 04月 07日 星期五 22:11:28 CST] OK
    [2023年 04月 07日 星期五 22:11:28 CST] Install success!
    

    这里采用DNS验证获取证书,设置一下DNS厂商信息,比如DNSPOD,默认获取ZeroSSL证书,可以通过–server letsencrypt切换

    ➜ ~ export DP_Id="95731"
    ➜ ~ export DP_Key="***"
    ➜ ~ acme.sh --issue --dns dns_dp -d example.com -d "*.example.com"
    [2023年 04月 07日 星期五 22:14:24 CST] Using CA: https://acme.zerossl.com/v2/DV90
    [2023年 04月 07日 星期五 22:14:24 CST] Create account key ok.
    [2023年 04月 07日 星期五 22:14:24 CST] No EAB credentials found for ZeroSSL, let's get one
    [2023年 04月 07日 星期五 22:14:29 CST] Registering account: https://acme.zerossl.com/v2/DV90
    [2023年 04月 07日 星期五 22:14:38 CST] Registered
    [2023年 04月 07日 星期五 22:14:38 CST] ACCOUNT_THUMBPRINT='AY5noJZbSullM7fVQOnluxQJmWiiKJHl0vzVsYwwGsg'
    [2023年 04月 07日 星期五 22:14:38 CST] Creating domain key
    [2023年 04月 07日 星期五 22:14:38 CST] The domain key is here: /root/.acme.sh/example.com_ecc/example.com.key
    [2023年 04月 07日 星期五 22:14:38 CST] Multi domain='DNS:example.com
    [2023年 04月 07日 星期五 22:14:39 CST] Getting domain auth token for each domain
    [2023年 04月 07日 星期五 22:14:56 CST] Getting webroot for domain='example.com'
    [2023年 04月 07日 星期五 22:14:56 CST] Getting webroot for domain='*.example.com'
    [2023年 04月 07日 星期五 22:14:56 CST] Adding txt value: q-pQccpOPbYbC4h_veQTSvj2OgUpgg9kBUFpms9fa9k for domain: _acme-challenge.example.com
    [2023年 04月 07日 星期五 22:14:57 CST] Adding record
    [2023年 04月 07日 星期五 22:14:57 CST] The txt record is added: Success.
    [2023年 04月 07日 星期五 22:15:01 CST] Let's check each DNS record now. Sleep 20 seconds first.
    [2023年 04月 07日 星期五 22:15:23 CST] You can use '--dnssleep' to disable public dns checks.
    [2023年 04月 07日 星期五 22:15:23 CST] See: https://github.com/acmesh-official/acme.sh/wiki/dnscheck
    [2023年 04月 07日 星期五 22:15:23 CST] Checking example.com for _acme-challenge.example.com
    [2023年 04月 07日 星期五 22:15:23 CST] Please refer to https://curl.haxx.se/libcurl/c/libcurl-errors.html for error code: 35
    [2023年 04月 07日 星期五 22:15:27 CST] Domain example.com '_acme-challenge.example.com' success.
    [2023年 04月 07日 星期五 22:15:34 CST] All success, let's return
    [2023年 04月 07日 星期五 22:15:34 CST] Verifying: example.com
    [2023年 04月 07日 星期五 22:15:46 CST] Processing, The CA is processing your order, please just wait. (1/30)
    [2023年 04月 07日 星期五 22:15:51 CST] Success
    [2023年 04月 07日 星期五 22:15:51 CST] Verifying: *.example.com
    [2023年 04月 07日 星期五 22:15:55 CST] Processing, The CA is processing your order, please just wait. (1/30)
    [2023年 04月 07日 星期五 22:16:28 CST] Success
    [2023年 04月 07日 星期五 22:16:28 CST] Removing DNS records.
    [2023年 04月 07日 星期五 22:16:28 CST] Removing txt: q-pQccpOPbYbC4h_veQTSvj2OgUpgg9kBUFpms9fa9k for domain: _acme-challenge.example.com
    [2023年 04月 07日 星期五 22:16:30 CST] Removed: Success
    [2023年 04月 07日 星期五 22:16:34 CST] Verify finished, start to sign.
    [2023年 04月 07日 星期五 22:16:35 CST] Lets finalize the order.
    [2023年 04月 07日 星期五 22:16:40 CST] Order status is processing, lets sleep and retry.
    [2023年 04月 07日 星期五 22:16:40 CST] Retry after: 15
    [2023年 04月 07日 星期五 22:17:00 CST] Downloading cert.
    [2023年 04月 07日 星期五 22:17:00 CST] Le_LinkCert='https://acme.zerossl.com/v2/DV90/cert/pcAU9PLEoObR7xYPTb9x7w'
    [2023年 04月 07日 星期五 22:17:03 CST] Cert success.
    -----BEGIN CERTIFICATE-----
    MIIELzCCA7agAwIBAgIRAOO4Gyu...
    QRwR2SSrAlEIeJXua7aYyyEEJQ==
    -----END CERTIFICATE-----
    [2023年 04月 07日 星期五 22:17:03 CST] Your cert is in: /root/.acme.sh/example.com_ecc/example.com.cer
    [2023年 04月 07日 星期五 22:17:03 CST] Your cert key is in: /root/.acme.sh/example.com_ecc/example.com.key
    [2023年 04月 07日 星期五 22:17:03 CST] The intermediate CA cert is in: /root/.acme.sh/example.com_ecc/ca.cer
    [2023年 04月 07日 星期五 22:17:03 CST] And the full chain certs is there: /root/.acme.sh/example.com_ecc/fullchain.cer
    

    最后安装证书

    ➜  ~ acme.sh --install-cert -d example.com -d "*.example.com"--key-file /etc/letsencrypt/live/example.com/privkey.pem --fullchain-file /etc/letsencrypt/live/example.com/chain.pem --reloadcmd "systemctl restart nginx"
    [2023年 04月 07日 星期五 23:00:13 CST] The domain 'example.com' seems to have a ECC cert already, lets use ecc cert.
    [2023年 04月 07日 星期五 23:00:13 CST] Installing key to: /etc/letsencrypt/live/example.com/privkey.pem
    [2023年 04月 07日 星期五 23:00:13 CST] Installing full chain to: /etc/letsencrypt/live/example.com/chain.pem
    [2023年 04月 07日 星期五 23:00:13 CST] Run reload cmd: systemctl restart nginx
    [2023年 04月 07日 星期五 23:00:13 CST] Reload success
    

    以后就可以自动更新了

    ➜  ~  crontab -l  | grep acme 
    26 0 * * * "/root/.acme.sh"/acme.sh --cron --home "/root/.acme.sh" > /dev/null
    

    最近登录后台发现WordPress提示升级到PHP 7.3,按照它的指示

    在CentOS 7上升级PHP5.4 到PHP 7.3很简单:
    首先安装Remi和EPEL仓库

    yum install wget
    wget https://dl.fedoraproject.org/pub/epel/epel-release-latest-7.noarch.rpm
    wget http://rpms.remirepo.net/enterprise/remi-release-7.rpm
    rpm -Uvh remi-release-7.rpm 
    rpm -Uvh epel-release-latest-7.noarch.rpm
    
    yum install yum-utils
    

    启用remi-php73的源,yum update升级会自动升级PHP及扩展

    [root@li846-239 ~]# yum-config-manager --enable remi-php73
    [root@li846-239 ~]# yum repolist
    Loaded plugins: fastestmirror
    Loading mirror speeds from cached hostfile
     * base: mirrors.linode.com
     * epel: kartolo.sby.datautama.net.id
     * extras: mirrors.linode.com
     * remi-php73: mirror.xeonbd.com
     * remi-safe: mirror.xeonbd.com
     * updates: mirrors.linode.com
    repo id                                                                                                   repo name                                                   status
    base/7/x86_64                                                                                             CentOS-7 - Base                                              10,019
    epel/x86_64                                                                                               Extra Packages for Enterprise Linux 7 - x86_64               13,051
    extras/7/x86_64                                                                                           CentOS-7 - Extras                                               385
    remi-php73                                                                                                Remi's PHP 7.3 RPM repository for Enterprise Linux 7 - x86_64   305
    remi-safe                                                                                                 Safe Remi's RPM repository for Enterprise Linux 7 - x86_64    3,188
    updates/7/x86_64                                                                                          CentOS-7 - Updates                                            1,511
    repolist: 28,825
    
    
    yum update -y
    

    检查PHP版本,重启Apache

    [root@li846-239 ~]# php -v
    PHP 7.3.4 (cli) (built: Apr  2 2019 13:48:50) ( NTS )
    Copyright (c) 1997-2018 The PHP Group
    Zend Engine v3.3.4, Copyright (c) 1998-2018 Zend Technologies
    [root@li846-239 ~]# systemctl restart httpd
    

    也可以禁用对应PHP版本的源,选择性升级PHP到对应版本

    yum-config-manager --disable remi-php72
    

    顺便升级下php-mcrypt和ZipArchive

    yum install php-mcrypt
    yum install php-pecl-zip
    

    参考链接:
    How To Install Linux, Apache, MySQL, PHP (LAMP) stack On CentOS 7
    How to enable EPEL repository?
    How to Secure Your Server
    Introduction to FirewallD on CentOS
    How to Upgrade PHP 5.6 to PHP 7.2 on CentOS VestaCP

    PHP MongoDB Replica Set应用

    MongoDB是个面向文档管理的NoSQL数据库,能够直接存取JSON数据,支持海量数据。公司内部的一个单点登录系统使用MongoDB来存储用户的session,以便在不同应用,服务器之间共享登录信息,解决了服务器切换用户状态丢失(被登出)的问题。单点登录系统前端采用PHP,与LDAP交互认证用户信息,提供登录界面,API等。MongoDB则采用Replica Set模式以便支持高可用。
    在CentOS 6.5上安装MongoDB,首先添加源仓库

    $ suod vim /etc/yum.repos.d/mongodb.repo
    [mongodb]
    name=MongoDB Repository
    baseurl=http://downloads-distro.mongodb.org/repo/redhat/os/x86_64/
    gpgcheck=0
    enabled=0
    

    安装,启动,连接MongoDB

    $ sudo yum --enablerepo=mongodb install mongodb-org
    $ sudo /sbin/chkconfig --levels 235 mongod on
    $ sudo mongod --port 27017 --dbpath /data/db1
    $ mongo --port 27017
    

    创建用户SSOReplUser

    > use admin 
    > db.createUser( { user: "SSOReplUser", pwd: "<password>", roles: [ { role: "root", db: "admin" } ] });
    

    创建集群要用到的key

    $ sudo openssl rand -base64 741 > /home/sso/mongodb-keyfile 
    $ sudo chmod 600 /home/sso/mongodb-keyfile
    

    编辑MongoDB配置文件

    $ sudo vim /etc/mongod.conf
    # Replication Options 
    # in replicated mongo databases, specify the replica set name here 
    replSet=SSOReplSet 
    # maximum size in megabytes for replication operation log 
    #oplogSize=1024 
    # path to a key file storing authentication info for connections # between replica set members keyFile=/home/sso/mongodb-keyfile
    

    重启mongod服务

    $ sudo /etc/init.d/mongod stop   
    $ sudo /usr/bin/mongod -f /etc/mongod.conf
    

    使用SSOReplUser登录

    > use admin 
    > db.auth("SSOReplUser", "<password>");
    

    初始化集群

    > rs.initiate()
    > rs.conf()   
    {
      "_id": "SSOReplSet",
      "version": 1,
      "members": [
        {
          "_id": 1,
          "host": "192.168.33.10:27017"
        }
      ]
    }
    

    在其他机器上按照上面步骤安装MongoDB,更改配置,复制对应的mongodb-keyfile并启动。
    回到192.168.33.10并添加机器

    SSOReplSet:PRIMARY> rs.add("192.168.33.11:27017") 
    SSOReplSet:PRIMARY> rs.add("192.168.33.12:27017") 
    SSOReplSet:PRIMARY> rs.add("192.168.33.13:27017")
    #SSOReplSet:PRIMARY> rs.remove("192.168.33.13:27017")
    

    在从机上认证查看

    SSOReplSet:SECONDARY> use admin 
    SSOReplSet:SECONDARY> db.auth("SSOReplUser", "<password>");   
    SSOReplSet:SECONDARY> rs.status()
    

    MongoDB的Replica set模式最少要求3台机器,以便在PRIMARY机器故障时,能够自我选举出新的PRIMARY,但需要n/2+1的机器投票同意。例如刚才配置了4台机器,那么需要4/2+1=3台机器投票,能够承受一台机器故障。如果是集群有5台机器,则能够承受2台机器故障。因此再配置一台不存储数据的Arbiter机器比较合理。
    按照上面的步骤安装,复制mongodb-keyfile文件,但需要更改mongod.conf

    $sudo vim /etc/mongod.conf
    nojournal=true
    

    然后启动mongod服务并在PRIMARY机器上将这台机器加入机器

    SSOReplSet:PRIMARY> use admin   
    SSOReplSet:PRIMARY> db.auth("SSOReplUser", "<password>");   
    SSOReplSet:PRIMARY> rs.addArb("<ip of arbiter>");
    

    PHP的mongo扩展安装比较简单,下载对应版本,启用即可。然而在应用过程中发现登录有点慢,启用看PHP mongo扩展profiling功能,查看PHP日志

    <?php
    \MongoLog::setLevel(\MongoLog::ALL);
    \MongoLog::setModule(\MongoLog::ALL);
    try{
        echo  microtime(true) . PHP_EOL;
        echo "aaa01(primary)" . PHP_EOL;
        $m = new \MongoClient("mongodb://admin:[email protected]:27017/?replicaSet=SSOReplSet ");
        echo  microtime(true) . PHP_EOL;
        echo "aaa01(primay), bbb01(secondary),ccc01(secondary),ddd01(secondary)" . PHP_EOL;
        $m = new \MongoClient("mongodb://admin:[email protected]:27017,192.168.33.11:27017,192.168.33.12:27017,192.168.33.13:27017/?replicaSet=SSOReplSet ");
        echo  microtime(true) . PHP_EOL;
    } catch (\MongoConnectionException $e) {
        var_dump($e);
    }
    

    发现PHP连接MongoDB集群是这样子的

    即:

  • 1)在连接里面配置了几个MongoDB连接服务器,PHP每个都会创建连接去查询
  • 2)从每台服务器上查询出整个集群的服务器列表,再分别ping和连接这些服务器,如果连接不存在或不匹配则创建,无效的则销毁
  • 3)汇总所有服务器返回集群列表
  • 4)选择离自己最近的服务器并使用该与该服务器的连接
  • MongoDB 的写操作默认在Primary节点上操作完成即返回成功;读操作默认是也是从Primary上读取,所以需要去查询服务器。由于SSO应用部署在多个数据中心,网络抖动会造成较大影响,跨数据中心的查询并不会很快,如果每次都去连接并查询整个列表是比较耗时。另外如果在php里面配置的是IP而MongoDB Replica Set里面配置的是域名,则连接名会出现不匹配,而创建新的连接并销毁旧连接,也耗时。如果配置的是域名,则需要DNS解析。由于每台PHP服务器均已配置HA检测,最终每个应用只配置了一台服务器,并统一配置MongoDB集群为IP。而连接最快的是在Primary机器上,可以根据本机是否Primary来做HA:

    #!/usr/bin/env bash
    count=`ps -fe |grep "mongod" | grep -v "grep" | wc -l`
    FILE="/home/scripts-bits/master.conf"
    SERVER=`hostname`
    
    if [ $count -lt 1 ]; then
        rm -f $FILE
    else
        PRIMAY=`/usr/bin/mongo ${SERVER}:27017 --quiet --eval 'printjson(db.isMaster().ismaster);'`
        if [ "$PRIMAY" == "true" ]; then
        	if [ ! -f "$FILE" ]; then
        		touch "$FILE"
        	fi
        	REMOVE=`/usr/bin/mongo ${SERVER}:27017/admin --quiet /home/scripts-bits/mongo_status.js`
        fi
    fi
    

    删除故障节点(not reachable/healthy)的脚本mongo_status.js:

    db.auth('admin','<password>');
    conf=rs.status();
    members=conf["members"];
    for(i in members){
    	if(members[i]["state"] == 8){
    		rs.remove(members[i]["name"]);
    	}
    }
    

    这中间也出现过因为网络/机器故障,导致PHP等待连接超时的情况的,将该机器从集群中移除即可。然而当服务器是启动的(可以到达)情况下,MongoDB故障,则不会超时。可以更改connectTimeoutMS,以便减少等待。
    MongoDB的日志默认都是记录在/var/log/mongodb/下面并且会越来越大。创建Python脚本来定时清除它:

    #!/bin/env python
    import commands
    import datetime,time
    
    def rotate_log(path, expire = 30):
        str_now = time.strftime("%Y-%m-%d")
        dat_now = time.strptime(str_now, "%Y-%m-%d")
        array_dat_now = datetime.datetime(dat_now[0], dat_now[1], dat_now[2])
        lns = commands.getoutput("/bin/ls --full-time %s|awk '{print $6, $9}'" % path)
        for ln in lns.split('\n'):
            ws = ln.split()
            if len(ws) != 2:
                continue
            ws1 = time.strptime(ws[0], "%Y-%m-%d")
            ws2 = datetime.datetime(ws1[0], ws1[1], ws1[2])
            if (array_dat_now - ws2).days > expire:
                v_del = commands.getoutput("/bin/rm -rf %s/%s" % (path, ws[1]))
    
    
    def rotate_mongo():
        # get mongo pid
        mongo_pid = commands.getoutput("/sbin/pidof mongod")
        #print mongo_pid
        # send Sig to mongo
        if mongo_pid != '':
            cmd = "/bin/kill -USR1 %s" % (mongo_pid)
            # print cmd
            mongo_rotate = commands.getoutput(cmd)
        else:
            print "mongod is not running..."
    
    if __name__ == "__main__":
        log_path = "/var/log/mongodb/"
        expire = 30
        rotate_mongo()
        rotate_log(log_path, expire)


    加入到crontab里面去执行

    10 1 * * * /usr/bin/python /home/sso/mongo_rotate.py > /dev/null 2>&1
    

    参考连接
    mongodb与mysql相比的优缺点
    PHP MongoDB 复制集合
    MongoDB Replication
    MongoDB Enable Auth
    MongoDB Rotate Log Files
    Blocking connect() leads to cumulative timeouts for multiple inaccessible servers
    How Raft consensus algorithm will make replication even better in MongoDB 3.2
    Write Concern for Replica Sets
    MongoDB Read Preference

    日志系统设计

    日志系统是项目开发/运维当中非常重要的一部分,提供产品使用情况,跟踪调试信息等。以前都是各个项目各自实现日志记录,比如PHP、JAVA各自实现一套,如果要跨项目/服务器进行查询/跟踪/统计,则比较麻烦,比如Web后台–>业务模块–>基础组件,客户端–>公共接口–>业务模块等等。
    目前的项目都是将日志写入本地,首先需要定义统一的规范:

    格式
    DateTime | ServerIP | ClientIP | PID | RequestID|  Type | Level | Message|  Code
    
    解释
    DateTime:记录日志的当前时间戳
    ServerIP:当前服务器IP
    ClientIP:客户端IP
    PID:进程ID
    RequestID:交易号,即请求的唯一标识,使用uniqid(+UserCode)或UUID或,一次请求会有多条日志,,用于关联本次请求内的相关日志
    Type:日志类型,比如统计,操作(审计),业务等
    Level:日志等级
    Message:日志内容,当为值为数组或者对象时转为JSON
    Type为RUNTIME时,表示运行日志,属性:自定义
    Type为HTTP时,表示来源请求,属性:Url,Method(Get/Post),Params,RemoteIP,UserAgent,ReferUrl[,Action,Method]
    Type为REST时,表示外部调用,属性:Type(Http/Https),Url,Port,RequestParams,Response,RunTime;
    Type为SQL时,表示SQL执行,属性:Sql,RunTime
    Code:标识码,记录错误码、响应码、统计码、版本、自定义信息,方便统计
    

    这里的RequestID由入口处自动产生,用于标识一次请求,关联所产生的所有日志,需要在各个项目之间传递。为了减少日志,Level通常为Info级别,避免产生过多日志。为了方便调试追踪,RequestID和Level也可以在其他参数中指明,比如HTTP头里面附加。
    然后是日志收集:客户端收走日志系统,发送给日志系统服务端。
    然后分析处理呈现:服务端将接收到的日志,发给处理其他组件分析处理,提供Web界面的查询系统。研发人员,可以错误信息,定位问题;获悉程序运行情况进行调优;大数据分析日志,得出产品使用情况;运维平台则可以进行业务报警。

    日志产生由个语言依照规范自行实现,收集、保持则由FlumeKafka实现。Flume是一个分布式的日志收集、合并、移动系统,能够监控文件变化,将变化部分传输出去。Kafka是一个分布式的发布/订阅的消息流平台,包括Broker,Consumer,Producer都支持分布式,依赖Zookeeper实现。

    在PHP上面的实现,一开始使用log4php,看起来很美好,但是性能很差,对业务影响较大。决定再次简化,砍掉不必要的东西(Socket,邮件等等),在C语言开发的PHP日志扩展SeasLog基础上在做开发,将日志文件保存在本地。为了减少日志所占用内存,每超过一定的大小的日志即进行保存,否则在最后进行保存,利用了Nginx的fastcgi_finish_request特性。生产上发现,每天产生的文件日志太大了,需要控制日志信息大小、等级,并及时清理。
    对于Web后台,还结合FirePHP,将日志直接输出到浏览器,方便边运行变调试。

    参考链接:
    最佳日志实践
    Optimal Logging
    Flume+Kafka收集Docker容器内分布式日志应用实践
    基于Flume的美团日志收集系统(一)架构和设计
    Twitter是如何构建高性能分布式日志的
    开源日志系统比较
    Kafka剖析(一):Kafka背景及架构介绍
    基于Flume的野狗实时日志系统的演进和优化
    EVODelavega/phpkafka
    有赞统一日志平台初探
    RabbitMQ和kafka从几个角度简单的对比
    Flume-ng的原理和使用
    利用flume+kafka+storm+mysql构建大数据实时系统