分类目录归档:nginx

API 网关 Kong

从前开发一个互联网服务程序,大概可以在一台机器上完成:数据库、应用都在一起。随着业务发展壮大,会把数据库独立出来,以便扩展拆分。然后再把一部分公用业务独立出来扩展,譬如文件存储、缓存等。接着业务也才拆分,比如会员、商品。微服务大行其道,各个团队维护着许多服务、API。这么多服务,前端业务逻辑该怎么接入呢?
如今单一的前端UI也可能是多个团队共同开发的结果。当你在本地开发一个小功能时,甚至会牵扯到多个前端UI/后端API。一个前端页面除了加载自己的资源外,还加载V2/V3的API(为什么会同时存在V1/V2/V3的API),甚至嵌入了另外一个页面(React看起来也不错),该怎么调试这种混合开发呢?cookie都传递不过去,好吧,使用JWT代替,再设置一下跨源资源共享(CORS)。。。但是那些旧的应用怎么办?
当我们启动一个Node.js应用时npm run start,默认监听3000端口。当然我们也可以让它监听80端口。但是当我们多开几个应用时,只好让它们都监听不同端口了,怎么样才能统一端口监听呢?当然Node.js可以通过诸如node-http-proxy来转发这些请求,但是代理转发跟应用业务无关吧?如果是其他编程语言呢?都重复这些代理配置/开发吗?Don’t Repeat Yourself。
Faas也日渐流行,比如AWS Lambda, 强调仅仅专注某个功能,根据事件驱动进行计算,那么每个服务也要开发一整套路由分发/认证/日志吗?
这些问题可以使用反向代理来解决,提供统一的服务入口,对前端/客户端隐藏背后的细节,最简单的当然是Nginx。Nginx监听来自某个端口(比如80)的请求,然后根据不同的来源/端口/域名/url分发给不同的后端服务器。这看起来跟云服务厂商各自开发的负载均衡器差不多,比如AWS ELB
在本地开发的时候,我们当然不会使用ELB来解决。直接使用Nginx当然也没啥问题,编辑一下配置文件,重启应用。但是如果有个UI就更好了,如果还有API就非常好了-这样就能方便的在线注册/更改路由而不需要重启服务器,在这个快速发展、弹性开发的年代更需要这个能力。
Kong是一个基于OpenResty的网关服务器,可以进行路由(转发/负载),插件(日志/认证/监控)管理,并提供RESTful API。而OpenResty 是一个基于Nginx与Lua的高性能Web平台,使用Lua来构建动态网关。听起来像是在Nginx上面编程,这跟在Apache上面使用PHP模块进行编程有什么区别?最大的区别在于,这里的编程对象是Nginx(或者公共模块),扩展Nginx能力,比如负载均衡/日志/认证/监控,而不是输出web页面/业务逻辑。这些东西抽出来以后,就不需要每个模块再重复开发了,比如认证/安全。
在本地可以使用docker来运行Kong服务,麻烦在于数据库迁移工作。通常部署Kong需要几个步骤,比如初始化数据库,迁移升级等等。网上的配置大都过时了,这里可以使用官方提供docker-compose.yml来做数据库工作,并且使用Konga作为管理UI

➜  kong ls
POSTGRES_PASSWORD         data                      docker-compose.yml
➜  kong ls data
postgresql
➜  kong cat POSTGRES_PASSWORD
kong
➜  kong cat docker-compose.yml
version: '3.7'

volumes:
  kong_data: {}

networks:
  kong-net:
    external: false

services:
  kong-migrations:
    image: "${KONG_DOCKER_TAG:-kong:latest}"
    command: kong migrations bootstrap
    depends_on:
      - db
    environment:
      KONG_DATABASE: postgres
      KONG_PG_DATABASE: ${KONG_PG_DATABASE:-kong}
      KONG_PG_HOST: db
      KONG_PG_USER: ${KONG_PG_USER:-kong}
      KONG_PG_PASSWORD_FILE: /run/secrets/kong_postgres_password
    secrets:
      - kong_postgres_password
    networks:
      - kong-net
    restart: on-failure
    deploy:
      restart_policy:
        condition: on-failure

  kong-migrations-up:
    image: "${KONG_DOCKER_TAG:-kong:latest}"
    command: kong migrations up && kong migrations finish
    depends_on:
      - db
    environment:
      KONG_DATABASE: postgres
      KONG_PG_DATABASE: ${KONG_PG_DATABASE:-kong}
      KONG_PG_HOST: db
      KONG_PG_USER: ${KONG_PG_USER:-kong}
      KONG_PG_PASSWORD_FILE: /run/secrets/kong_postgres_password
    secrets:
      - kong_postgres_password
    networks:
      - kong-net
    restart: on-failure
    deploy:
      restart_policy:
        condition: on-failure

  kong:
    image: "${KONG_DOCKER_TAG:-kong:latest}"
    user: "${KONG_USER:-kong}"
    depends_on:
      - db
    environment:
      KONG_ADMIN_ACCESS_LOG: /dev/stdout
      KONG_ADMIN_ERROR_LOG: /dev/stderr
      KONG_ADMIN_LISTEN: '0.0.0.0:8001'
      KONG_CASSANDRA_CONTACT_POINTS: db
      KONG_DATABASE: postgres
      KONG_PG_DATABASE: ${KONG_PG_DATABASE:-kong}
      KONG_PG_HOST: db
      KONG_PG_USER: ${KONG_PG_USER:-kong}
      KONG_PROXY_ACCESS_LOG: /dev/stdout
      KONG_PROXY_ERROR_LOG: /dev/stderr
      KONG_PG_PASSWORD_FILE: /run/secrets/kong_postgres_password
    secrets:
      - kong_postgres_password
    networks:
      - kong-net
    ports:
      - "8000:8000/tcp"
      - "127.0.0.1:8001:8001/tcp"
      - "8443:8443/tcp"
      - "127.0.0.1:8444:8444/tcp"
    healthcheck:
      test: ["CMD", "kong", "health"]
      interval: 10s
      timeout: 10s
      retries: 10
    restart: on-failure
    deploy:
      restart_policy:
        condition: on-failure

  db:
    image: postgres:9.5
    environment:
      POSTGRES_DB: ${KONG_PG_DATABASE:-kong}
      POSTGRES_USER: ${KONG_PG_USER:-kong}
      POSTGRES_PASSWORD_FILE: /run/secrets/kong_postgres_password
    secrets:
      - kong_postgres_password
    healthcheck:
      test: ["CMD", "pg_isready", "-U", "${KONG_PG_USER:-kong}"]
      interval: 30s
      timeout: 30s
      retries: 3
    restart: on-failure
    deploy:
      restart_policy:
        condition: on-failure
    stdin_open: true
    tty: true
    networks:
      - kong-net
    volumes:
      - /Users/xxxx/docker/kong/data/postgresql:/var/lib/postgresql/data

  konga:
    image: pantsel/konga
    environment:
      TOKEN_SECRET: channing.token
      DB_ADAPTER: postgres
      DB_HOST: db
      DB_USER: ${KONG_PG_USER:-kong}
      DB_PASSWORD: kong
      DB_DATABASE: ${KONG_PG_DATABASE:-kong}
    ports:
     - 1337:1337
    networks:
     - kong-net

    depends_on:
      - db

secrets:
  kong_postgres_password:
    file: ./POSTGRES_PASSWORD

运行docker-composer up就可以看到

➜  kong docker ps
CONTAINER ID        IMAGE                             COMMAND                  CREATED             STATUS                             PORTS                                                                                                NAMES
20ebe7885c0d        kong:latest                       "/docker-entrypoint.…"   2 hours ago         Up 11 seconds (healthy)            0.0.0.0:8000->8000/tcp, 127.0.0.1:8001->8001/tcp, 0.0.0.0:8443->8443/tcp, 127.0.0.1:8444->8444/tcp   kong_kong_1
4a7a39c863ae        pantsel/konga                     "/app/start.sh"          2 hours ago         Up 11 seconds                      0.0.0.0:1337->1337/tcp                                                                               kong_konga_1
aa732758fc51        postgres:9.5                      "docker-entrypoint.s…"   2 hours ago         Up 11 seconds (health: starting)   5432/tcp                                                                                             kong_db_1

访问http://127.0.0.1:1337/即可以进入Konga 管理界面了。8000/8443端口是需要监听转发的端口,8001/8444则是Kong RESTFUl管理API的端口。这里也可以把8000/8443改为80/443,这样访问的时候就可以直接使用域名/localhost而不必加端口了。
注册登录进去后首先要添加Kong RESTFUl管理API的地址,这里使用的是docker环境,IP是动态分配的,所以使用链接名就可以了

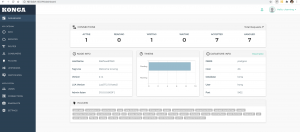
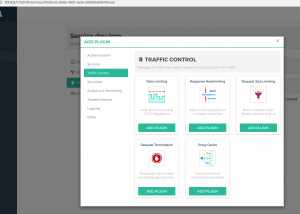
连接上Kong API后可以看到dashboard列出了支持的插件

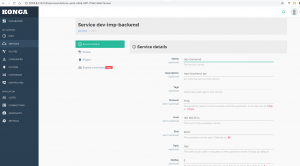
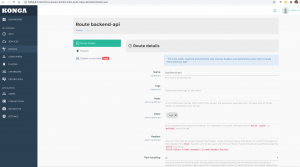
Kong里面的管理对象是service,路由转发/插件都是围绕service展开的,添加一个service


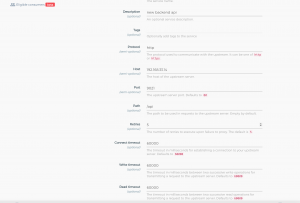
在它上面添加一个路由,这里我们在服务只监听以/api开头的url,并转发到后端服务器去


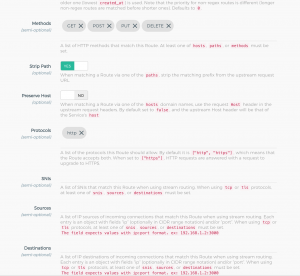
注意这里在route里面的path里面也需要添加/api,否则转发的时候会出错(多拼api)。最简单就是service监听不指定path,在route里指定。一个service下面可以有多个转发路由,每个可以独立管理、设置超时等。
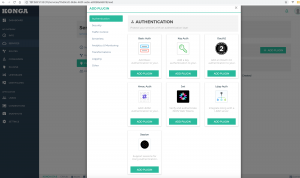
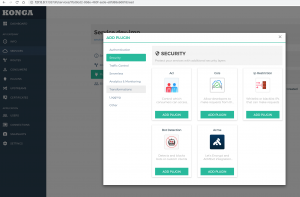
还可以为每个service绑定不同的插件进行处理,比如认证/安全/日志等等,这样就不用在不同的系统里面重复开发这些功能,使得各个团队更加专注也本业务开发


有效插件还可以进行流量限制、请求头/响应头修改等等。这些插件的功能需要基于consumer来开发管理,功能可以非常强大,详细可以参考文档
Kong还有一项功能Upstream配置,与Nginx的ngx_http_upstream_module差不多,可以作为负载均衡、流量分发控制使用。可以用命令行测试基于hostname的路由,

➜  kong curl -i -X GET \
  --url http://localhost:8000/ \
  --header 'Host: dev1.example.com'
HTTP/1.1 404 Not Found
Date: Tue, 27 Oct 2020 08:41:58 GMT
Content-Type: application/json; charset=utf-8
Connection: keep-alive
Content-Length: 48
X-Kong-Response-Latency: 1
Server: kong/2.1.4

{"message":"no Route matched with those values"}                                                                                                                                                                                                                             ➜  kong curl -i -X GET \
  --url http://localhost:8000/ \
  --header 'Host: dev.example.com'

HTTP/1.1 200 OK
Content-Type: text/html; charset=UTF-8
Transfer-Encoding: chunked
Connection: keep-alive
Date: Tue, 27 Oct 2020 08:42:21 GMT
Server: Apache/2.2.15 (CentOS)
X-Powered-By: PHP/5.6.40
Set-Cookie: PHPSESSID=0uc3aoc735j21sk3ni5s72vjc1; path=/
Expires: Thu, 19 Nov 1981 08:52:00 GMT
Cache-Control: no-store, no-cache, must-revalidate, post-check=0, pre-check=0
Pragma: no-cache
Access-Control-Allow-Credentials: true
Access-Control-Allow-Methods: POST, GET, OPTIONS, PUT, DELETE
Access-Control-Allow-Headers: X-CSRF-Token,Authorization,X-Accept-Charset,X-Accept,Content-Type
X-Kong-Upstream-Latency: 8397
X-Kong-Proxy-Latency: 0
Via: kong/2.1.4

<!DOCTYPE html PUBLIC "-//W3C//DTD XHTML 1.0 Strict//EN" "http://www.w3.org/TR/xhtml1/DTD/xhtml1-strict.dtd">
...

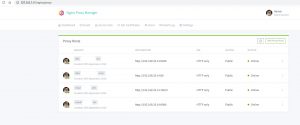
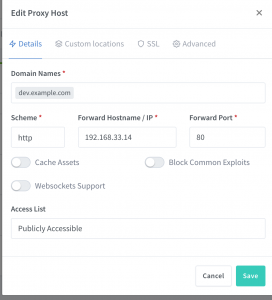
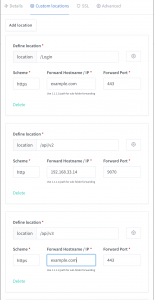
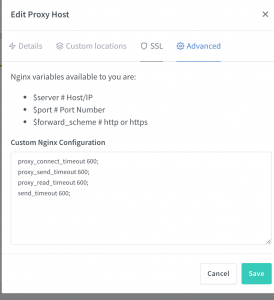
作为一个API网关,Kong能做的很多。如果只是在本地简单的做反向代理,可以使用nginx-proxy-manager,这也是一个基于Nginx开发的网关,根据WEB UI动态生成Nginx配置文件,然后执行/usr/sbin/nginx -s reload生效。有些参数不能通过UI配置(比如超时设置),可以直接写Nginx配置,upstream则支持直接转发tcp请求,支持websockets代理转发,甚至集成了Let’s encrypt自动申请SSL证书(需要验证域名)


本地同样可以使用docker跑起来,默认监听80/443端口,81端口即管理界面

➜  nginx-proxy-manager ls -lah
total 16
drwxr-xr-x   6 xxxx domain users   192B Sep 29 10:24 .
drwxr-xr-x  15 xxxx domain users   480B Sep 29 09:15 ..
-rw-r--r--   1 xxxx domain users   2.3K Sep 29 09:42 config.json
drwxr-xr-x   8 xxxx domain users   256B Sep 29 09:31 data
-rw-r--r--   1 xxxx domain users   740B Sep 29 10:24 docker-compose.yml
drwxr-xr-x   3 xxxx domain users    96B Oct 27 16:38 letsencrypt
➜  nginx-proxy-manager cat docker-compose.yml
version: "3"
services:
  app:
    image: 'jc21/nginx-proxy-manager:latest'
    restart: always
    ports:
      # Public HTTP Port:
      - '80:80'
      # Public HTTPS Port:
      - '443:443'
      # Admin Web Port:
      - '81:81'
      # TCP Forward Example:
      - '8022:8022'
    volumes:
      # Make sure this config.json file exists as per instructions above:
      - ./config.json:/app/config/production.json
      - ./data:/data
      - ./letsencrypt:/etc/letsencrypt
    depends_on:
      - db
  db:
    image: jc21/mariadb-aria
    restart: always
    environment:
      MYSQL_ROOT_PASSWORD: 'npm'
      MYSQL_DATABASE: 'npm'
      MYSQL_USER: 'npm'
      MYSQL_PASSWORD: 'npm'
    volumes:
      - ./data/mysql:/var/lib/mysql
➜  nginx-proxy-manager docker ps
CONTAINER ID        IMAGE                             COMMAND             CREATED             STATUS                PORTS                                                                    NAMES
3dd58e9cff1f        jc21/nginx-proxy-manager:latest   "/init"             4 weeks ago         Up 7 days (healthy)   0.0.0.0:80-81->80-81/tcp, 0.0.0.0:443->443/tcp, 0.0.0.0:8022->8022/tcp   nginx-proxy-manager_app_1
a033151b28ed        jc21/mariadb-aria                 "/scripts/run.sh"   4 weeks ago         Up 7 days             3306/tcp                                                                 nginx-proxy-manager_db_1

nginx-proxy-manager会将配置写在data目录下面,可以直接编辑这些文件,Nginx reload之后便会生效,可以看到这些文件,具体的加载规则参考文档

➜  nginx-proxy-manager ls data/nginx
dead_host        default_host     default_www      dummycert.pem    dummykey.pem     proxy_host       redirection_host stream           temp
➜  nginx-proxy-manager cat data/nginx/proxy_host/1.conf
# ------------------------------------------------------------
# dev.example.com
# ------------------------------------------------------------
server {
  set $forward_scheme http;
  set $server         "192.168.33.14";
  set $port           80;

  listen 80;
listen [::]:80;

  server_name dev.example.com;

  access_log /data/logs/proxy_host-1.log proxy;

proxy_connect_timeout 600;
proxy_send_timeout 600;
proxy_read_timeout 600;
send_timeout 600;

  location /Login {
    proxy_set_header Host $host;
    proxy_set_header X-Forwarded-Scheme $scheme;
    proxy_set_header X-Forwarded-Proto  $scheme;
    proxy_set_header X-Forwarded-For    $remote_addr;
    proxy_pass       https://login.example.com:443;

  }

  location /api/v2 {
    proxy_set_header Host $host;
    proxy_set_header X-Forwarded-Scheme $scheme;
    proxy_set_header X-Forwarded-Proto  $scheme;
    proxy_set_header X-Forwarded-For    $remote_addr;
    proxy_pass       http://192.168.33.14:9070;

  }

  location /api/v3 {
    proxy_set_header Host $host;
    proxy_set_header X-Forwarded-Scheme $scheme;
    proxy_set_header X-Forwarded-Proto  $scheme;
    proxy_set_header X-Forwarded-For    $remote_addr;
    proxy_pass       https://dev.ops.example.com:443;

  }

  location /Chat {
    proxy_set_header Host $host;
    proxy_set_header X-Forwarded-Scheme $scheme;
    proxy_set_header X-Forwarded-Proto  $scheme;
    proxy_set_header X-Forwarded-For    $remote_addr;
    proxy_pass       https://dev.ops.example.com:443;

  }

  location /Catalog {
    proxy_set_header Host $host;
    proxy_set_header X-Forwarded-Scheme $scheme;
    proxy_set_header X-Forwarded-Proto  $scheme;
    proxy_set_header X-Forwarded-For    $remote_addr;
    proxy_pass       http://192.168.33.1:3000;

  }

  location /static {
    proxy_set_header Host $host;
    proxy_set_header X-Forwarded-Scheme $scheme;
    proxy_set_header X-Forwarded-Proto  $scheme;
    proxy_set_header X-Forwarded-For    $remote_addr;
    proxy_pass       http://192.168.33.1:3000;

  }

  location /css {
    proxy_set_header Host $host;
    proxy_set_header X-Forwarded-Scheme $scheme;
    proxy_set_header X-Forwarded-Proto  $scheme;
    proxy_set_header X-Forwarded-For    $remote_addr;
    proxy_pass       http://192.168.33.1:3000;

  }

  location / {

    # Proxy!
    include conf.d/include/proxy.conf;
  }

  # Custom
  include /data/nginx/custom/server_proxy[.]conf;
}

➜  nginx-proxy-manager cat data/nginx/stream/1.conf
# ------------------------------------------------------------
# 8022 TCP: 1 UDP: 0
# ------------------------------------------------------------
server {
  listen 8022;
listen [::]:8022;

  proxy_pass 192.168.33.14:22;

  # Custom
  include /data/nginx/custom/server_stream[.]conf;
  include /data/nginx/custom/server_stream_tcp[.]conf;
}

在docker-compose.yml里面设置一下upstream监听转发的端口,就可以通过8022端口访问192.168.33.14的22端口了

➜  nginx-proxy-manager telnet 127.0.0.1 8022
Trying 127.0.0.1...
Connected to localhost.
Escape character is '^]'.
SSH-2.0-OpenSSH_5.3
^C^C^C^C^C^C^CConnection closed by foreign host.

不论是Kong还是nginx-proxy-manager均有提供API,极大的增强服务网关的可编程性,为动态上线/弹性扩展/自动化运维提供了便利。

参考链接:
从IaaS到FaaS—— Serverless架构的前世今生
聊一聊微服务网关 Kong
KONG网关 — KongA管理UI使用
云原生架构下的 API 网关实践: Kong (二)
微服务 API 网关 -Kong 详解
Creating a web API with Lua using Nginx OpenResty
Nginx基于TCP/UDP端口的四层负载均衡(stream模块)配置梳理
Nginx支持TCP代理和负载均衡-stream模块
聊聊 API Gateway 和 Netflix Zuul
Envoy 是什么?

Nginx + Frp/Ngrok反向代理Webhook至本地

跟第三方平台打交道,经常需要设置一个接受通知的Webhook,比如微信/Skype的回调。它们要求有一个可以在互联网上访问得了的入口,比如某个域名,如果是在本地开发的话,不好调试。通常使用花生壳来代理本地服务,但是花生壳有一些限制,比如端口。有些域名服务商,比如DNSPOD,Linode,提供相应的API,也可以自己搭建DDNS服务,但是也可能有端口访问限制。Frp/Ngrok都是Go语言开发的内网穿透工具,可以自己部署搭建。Frp是国人开发的一款反向代理软件,可以转发请求给位于NAT后面的机器,支持TCP,UDP,HTTP/HTTPS。Ngrok则是国外的一款内网穿透软件,也支持HTTP/HTTPS转发。这里使用Nginx作为反向代理服务器,接收互联网回调并转发给本地的Frp/Ngrok服务,由它们接收webhook请求并转发至本地开发环境。
前面使用OpenVpn搭建了私有网络,可以在Nginx里面配置转发给目标机器就可以了

vim /etc/nginx/conf.d/100-dev.example.conf

内容如下

server {
    listen 80;
    server_name dev.example.com;
    return 301 https://$host$request_uri;
}

server {

    listen 443;
    server_name dev.example.com;

    ssl_certificate           /etc/letsencrypt/live/example.com/cert.pem;
    ssl_certificate_key       /etc/letsencrypt/live/example.com/privkey.pem;

    ssl on;
    ssl_session_cache  builtin:1000  shared:SSL:10m;
    ssl_protocols  TLSv1 TLSv1.1 TLSv1.2;
    ssl_ciphers HIGH:!aNULL:!eNULL:!EXPORT:!CAMELLIA:!DES:!MD5:!PSK:!RC4;
    ssl_prefer_server_ciphers on;

    location / {
      proxy_set_header        Host $host;
      proxy_set_header        X-Real-IP $remote_addr;
      proxy_set_header        X-Forwarded-For $proxy_add_x_forwarded_for;
      proxy_set_header        X-Forwarded-Proto $scheme;

      proxy_pass          http://10.9.0.2/;
      proxy_redirect off;

    }
}

这里使用了let’s encryt的泛域名证书,官方并没有对应的插件,但是DNSPOD有提供相应的API,第三方开发了一个插件自certbot-dns-dnspod,安装这个插件并且配置Dnspod的API Token:

$ yum install certbot python2-certbot-nginx
$ certbot --nginx
$ curl https://bootstrap.pypa.io/get-pip.py -o get-pip.py
$ pip install certbot-dns-dnspod
$ vim /etc/letsencrypt/dnspod.conf
certbot_dns_dnspod:dns_dnspod_email = "[email protected]"
certbot_dns_dnspod:dns_dnspod_api_token = "123,ca440********"

$ chmod 600 /etc/letsencrypt/dnspod.conf

手动请求证书

$ certbot certonly -a certbot-dns-dnspod:dns-dnspod --certbot-dns-dnspod:dns-dnspod-credentials /etc/letsencrypt/dnspod.conf --server https://acme-v02.api.letsencrypt.org/directory -d example.com -d "*.example.com"
Saving debug log to /var/log/letsencrypt/letsencrypt.log
Plugins selected: Authenticator certbot-dns-dnspod:dns-dnspod, Installer None
Starting new HTTPS connection (1): acme-v02.api.letsencrypt.org
Obtaining a new certificate
Performing the following challenges:
dns-01 challenge for example.com
Starting new HTTPS connection (1): dnsapi.cn
Waiting 10 seconds for DNS changes to propagate
Waiting for verification...
Cleaning up challenges
Resetting dropped connection: acme-v02.api.letsencrypt.org

IMPORTANT NOTES:
 - Congratulations! Your certificate and chain have been saved at:
   /etc/letsencrypt/live/example.com/fullchain.pem
   Your key file has been saved at:
   /etc/letsencrypt/live/example.com/privkey.pem
   Your cert will expire on 2019-08-04. To obtain a new or tweaked
   version of this certificate in the future, simply run certbot
   again. To non-interactively renew *all* of your certificates, run
   "certbot renew"
*/1 * * * * /usr/local/qcloud/stargate/admin/start.sh > /dev/null 2>&1 &
 - If you like Certbot, please consider supporting our work by:

   Donating to ISRG / Let's Encrypt:   https://letsencrypt.org/donate
   Donating to EFF:                    https://eff.org/donate-le


$ ls -la /etc/letsencrypt/live/example.com/
total 12
drwxr-xr-x 2 root root 4096 May  6 12:06 .
drwx------ 3 root root 4096 May  6 12:06 ..
lrwxrwxrwx 1 root root   34 May  6 12:06 cert.pem -> ../../archive/example.com/cert1.pem
lrwxrwxrwx 1 root root   35 May  6 12:06 chain.pem -> ../../archive/example.com/chain1.pem
lrwxrwxrwx 1 root root   39 May  6 12:06 fullchain.pem -> ../../archive/example.com/fullchain1.pem
lrwxrwxrwx 1 root root   37 May  6 12:06 privkey.pem -> ../../archive/example.com/privkey1.pem
-rw-r--r-- 1 root root  692 May  6 12:06 README

配置证书自动更新

0 0,12 * * * python -c 'import random; import time; time.sleep(random.random() * 3600)' && certbot renew

Frp的开发者已经提供了编译好的frp服务端和客户端,下载即可使用。这里使用docker来运行Frp服务,使用这个Dockerfile,更改版本号为0.26.0,并编译

$ docker build . -t frps:0.26
$ docker images
REPOSITORY           TAG                 IMAGE ID            CREATED             SIZE
frps                 0.26                8a87cb91d4de        2 hours ago         21.1MB

测试一下SSH代理服务,创建服务端配置文件

mkdir -p frp/conf
vim frp/conf/frps.ini

frps.ini内容

[common]
bind_port = 7000

运行一下frp服务端

#清除先前运行的容器
$ docker rm frp-server
$ docker run --name frp-server -v /root/frp/conf:/conf -p 7000:7000 -p 6000:6000 frps:0.26
2019/04/22 06:41:17 [I] [service.go:136] frps tcp listen on 0.0.0.0:7000
2019/04/22 06:41:17 [I] [root.go:204] Start frps success
2019/04/22 06:41:27 [I] [service.go:337] client login info: ip [110.87.98.82:61894] version [0.26.0] hostname [] os [linux] arch [386]
2019/04/22 06:41:27 [I] [tcp.go:66] [e8783ecea2085e15] [ssh] tcp proxy listen port [6000]
2019/04/22 06:41:27 [I] [control.go:398] [e8783ecea2085e15] new proxy [ssh] success
2019/04/22 06:41:41 [I] [proxy.go:82] [e8783ecea2085e15] [ssh] get a new work connection: [110.*.*.*:61894]

这里映射了2个端口,端口7000是frp服务端监听的端口,以便客户端能够连接上;端口6000是需要服务端监听这个端口,以便提供反向代理服务,比如SSH。如果使用的是腾讯云,相应的端口需要在安全组放行。
客户端直接下对应的包,里面有配置试例。创建本地配置文件frpc.ini如下

[common]
server_addr = 123.*.*.*
server_port = 7000

[ssh]
type = tcp
local_ip = 127.0.0.1
local_port = 22
remote_port = 6000

这个配置即告诉服务端,将服务端的6000端口转发到本地的22端口。本地运行

$ ./frpc -c ./frpc.ini.ssh 
2019/04/22 06:41:27 [I] [service.go:221] login to server success, get run id [e8783ecea2085e15], server udp port [0]
2019/04/22 06:41:27 [I] [proxy_manager.go:137] [e8783ecea2085e15] proxy added: [ssh]
2019/04/22 06:41:27 [I] [control.go:144] [ssh] start proxy success

然后在服务端连接客户端。这里连接的是服务端的6000端口,会被转发给远程(局域网内)主机

[[email protected]]$ ssh -oPort=6000 [email protected]*.*.*
The authenticity of host '[123.*.*.*]:6000 ([123.*.*.*]:6000)' can't be established.
RSA key fingerprint is SHA256:NhBO/PDL***********************.
RSA key fingerprint is MD5:20:70:e2:*:*:*:*:*:*:*:*:*:*:*:*:*.
Are you sure you want to continue connecting (yes/no)? yes
Warning: Permanently added '[123.*.*.*]:6000' (RSA) to the list of known hosts.
[email protected]*.*.*'s password:
Last login: Mon Apr 22 06:39:07 2019 from 10.0.2.2
[[email protected] ~]$ exit
logout
Connection to 123.*.*.* closed.

Frp转发http服务很简单。在conf目录下创建配置frps.ini监听本机来自8080端口的HTTP请求

[common]
bind_port = 7000
vhost_http_port = 8080

[[email protected]_1_218_centos frp]# docker run --name frp-server -v /root/frp/conf:/conf -p 7000:7000 -p 8080:8080 frps:0.26
2019/05/06 07:26:28 [I] [service.go:136] frps tcp listen on 0.0.0.0:7000
2019/05/06 07:26:28 [I] [service.go:178] http service listen on 0.0.0.0:8080
2019/05/06 07:26:28 [I] [root.go:204] Start frps success
2019/05/06 07:26:51 [I] [service.go:337] client login info: ip [123.*.*.*:56758] version [0.26.0] hostname [] os [linux] arch [386]
2019/05/06 07:26:51 [I] [http.go:72] [19f60a30aa924343] [web] http proxy listen for host [test.example.com] location []
2019/05/06 07:26:51 [I] [control.go:398] [19f60a30aa924343] new proxy [web] success
2019/05/06 07:27:05 [I] [proxy.go:82] [19f60a30aa924343] [web] get a new work connection: [123.*.*.*:56758]
2019/05/06 07:27:06 [I] [proxy.go:82] [19f60a30aa924343] [web] get a new work connection: [123.*.*.*:56758]

然后配置Nginx转发请求

$ vim /etc/nginx/conf.d/100-dev.example.conf

    location / {
      proxy_set_header        Host $host;
      proxy_set_header        X-Real-IP $remote_addr;
      proxy_set_header        X-Forwarded-For $proxy_add_x_forwarded_for;
      proxy_set_header        X-Forwarded-Proto $scheme;

      proxy_pass          http://127.0.0.1:8080/;
      proxy_redirect off;

    }

创建本地web传教客户端配置frpc.ini,将来自服务器dev.example.com:8080端口的HTTP请求转发至本地80端口

[common]
server_addr = 123.*.*.*
server_port = 7000

[web]
type = http
local_port = 80
custom_domains = dev.example.com

运行本地客户端

[[email protected] frp]# ./frpc -c ./frpc.ini
2019/05/06 07:26:51 [I] [service.go:221] login to server success, get run id [19f60a30aa924343], server udp port [0]
2019/05/06 07:26:51 [I] [proxy_manager.go:137] [19f60a30aa924343] proxy added: [web]
2019/05/06 07:26:51 [I] [control.go:144] [web] start proxy success
2019/05/06 07:27:37 [E] [control.go:127] work connection closed, EOF
2019/05/06 07:27:37 [I] [control.go:228] control writer is closing
2019/05/06 07:27:37 [I] [service.go:127] try to reconnect to server...

访问dev.example.com既可以看到本地web服务器页面。Frp还可以代理其他请求,也有在它基础上二次加工提供基于token认证的转发服务。
Ngrok 2.0以后不再开源,只能使用1.3版本的搭建。这里使用docker-ngrok来构建。Ngrok构建需要SSL证书,复制刚才生成的letsencypt证书并更改server.sh

$ git clone https://github.com/hteen/docker-ngrok
$ cp /etc/letsencrypt/live/example.com/fullchain.pem myfiles/base.pem
$ cp /etc/letsencrypt/live/example.com/fullchain.pem myfiles/fullchain.pem
$ cp /etc/letsencrypt/live/example.com/privkey.pem myfiles/privkey.pem

$ vim server.sh
#!/bin/sh
set -e

if [ "${DOMAIN}" == "**None**" ]; then
    echo "Please set DOMAIN"
    exit 1
fi

if [ ! -f "${MY_FILES}/bin/ngrokd" ]; then
    echo "ngrokd is not build,will be build it now..."
    /bin/sh /build.sh
fi


${MY_FILES}/bin/ngrokd -tlsKey=${MY_FILES}/privkey.pem -tlsCrt=${MY_FILES}/fullchain.pem -domain="${DOMAIN}" -httpAddr=${HTTP_ADDR} -httpsAddr=${HTTPS_ADDR} -tunnelAddr=${TUNNEL_ADDR}

构建Ngrok镜像

[[email protected]_1_218_centos docker-ngrok]# docker build -t ngrok:1.3 .
[[email protected]_1_218_centos docker-ngrok]# docker images
REPOSITORY           TAG                 IMAGE ID            CREATED             SIZE
ngrok                1.3                 dc70190d6377        13 seconds ago      260MB
frps                 0.26                8a87cb91d4de        2 hours ago         21.1MB
alpine               latest              cdf98d1859c1        12 days ago         5.53MB

然后交叉编译生成Linux/Mac/Windows平台的客户端

$ rm -rf assets/client/tls/ngrokroot.crt
$ cp /etc/letsencrypt/live/example.com/chain.pem assets/client/tls/ngrokroot.crt
$ rm -rf assets/server/tls/snakeoil.crt
$ cp /etc/letsencrypt/live/example.com/cert.pem assets/server/tls/snakeoil.crt
$ rm -rf assets/server/tls/snakeoil.key
$ cp /etc/letsencrypt/live/example.com/privkey.pem assets/server/tls/snakeoil.key
$ GOOS=linux GOARCH=amd64 make release-client
$ GOOS=windows GOARCH=amd64 make release-client
$ GOOS=darwin GOARCH=amd64 make release-client

在服务器上运行Ngrok服务,将8090端口请求转发给容器的80端口,并且映射容器的4443端口到服务器的7000端口,以便客户端连接

[[email protected]_1_218_centos docker-ngrok]# docker run --name ngrok -e DOMAIN='example.com' -p 8090:80 -p 8091:443 -p 7000:4443 -v /root/docker-ngrok/myfiles:/myfiles ngrok:1.3 /bin/sh /server.sh
[09:18:21 UTC 2019/05/07] [INFO] (ngrok/log.(*PrefixLogger).Info:83) [registry] [tun] No affinity cache specified
[09:18:21 UTC 2019/05/07] [INFO] (ngrok/log.Info:112) Listening for public http connections on [::]:80
[09:18:21 UTC 2019/05/07] [INFO] (ngrok/log.Info:112) Listening for public https connections on [::]:443
[09:18:21 UTC 2019/05/07] [INFO] (ngrok/log.Info:112) Listening for control and proxy connections on [::]:4443
[09:18:21 UTC 2019/05/07] [INFO] (ngrok/log.(*PrefixLogger).Info:83) [metrics] Reporting every 30 seconds
[09:18:27 UTC 2019/05/07] [INFO] (ngrok/log.(*PrefixLogger).Info:83) [tun:18e8cd42] New connection from 123.*.*.*:50529
[09:18:27 UTC 2019/05/07] [DEBG] (ngrok/log.(*PrefixLogger).Debug:79) [tun:18e8cd42] Waiting to read message
[09:18:27 UTC 2019/05/07] [DEBG] (ngrok/log.(*PrefixLogger).Debug:79) [tun:18e8cd42] Reading message with length: 125
[09:18:27 UTC 2019/05/07] [DEBG] (ngrok/log.(*PrefixLogger).Debug:79) [tun:18e8cd42] Read message {"Type":"Auth","Payload":{"Version":"2","MmVersion":"1.7","User":"","Password":"","OS":"linux","Arch":"amd64","ClientId":""}}
[09:18:27 UTC 2019/05/07] [INFO] (ngrok/log.(*PrefixLogger).Info:83) [ctl:18e8cd42] Renamed connection tun:18e8cd42
[09:18:27 UTC 2019/05/07] [INFO] (ngrok/log.(*PrefixLogger).Info:83) [registry] [ctl] Registered control with id 1957f20b9b3ce3b76c7d8fc8b16276ed
[09:18:27 UTC 2019/05/07] [DEBG] (ngrok/log.(*PrefixLogger).Debug:79) [ctl:18e8cd42] [1957f20b9b3ce3b76c7d8fc8b16276ed] Writing message: {"Type":"AuthResp","Payload":{"Version":"2","MmVersion":"1.7","ClientId":"1957f20b9b3ce3b76c7d8fc8b16276ed","Error":""}}
[09:18:27 UTC 2019/05/07] [DEBG] (ngrok/log.(*PrefixLogger).Debug:79) [ctl:18e8cd42] [1957f20b9b3ce3b76c7d8fc8b16276ed] Writing message: {"Type":"ReqProxy","Payload":{}}
[09:18:27 UTC 2019/05/07] [DEBG] (ngrok/log.(*PrefixLogger).Debug:79) [ctl:18e8cd42] [1957f20b9b3ce3b76c7d8fc8b16276ed] Waiting to read message

将刚才编译的客户端下载下来,创建grok.cfg,连接服务器的7000端口

server_addr: "example.com:7000"
trust_host_root_certs: false

指定要监听的域名,及本地web端口

./ngrok -config=ngrok.cfg -subdomain=dev 9010

ngrok                                                                                                                                                                                                                                                         (Ctrl+C to quit)
                                                                                                                                                                                                                                                                              
Tunnel Status                 online                                                                                                                                                                                                                                          
Version                       1.7/1.7                                                                                                                                                                                                                                         
Forwarding                    http://dev.flexkit.cn -> 127.0.0.1:9010                                                                                                                                                                                                         
Forwarding                    https://dev.flexkit.cn -> 127.0.0.1:9010                                                                                                                                                                                                        
Web Interface                 127.0.0.1:4040                                                                                                                                                                                                                                  
# Conn                        2                                                                                                                                                                                                                                               
Avg Conn Time                 46.84ms                                                                                                                                                                                                                                         


HTTP Requests                                                         
-------------                                                         
                                                                      
GET /teams                    200 OK                   

请求dev.example.com即可以访问到本机9010端口的web服务。
附:ZeroTier是一个软件定义网络(SDN)软件,可以免费组建私有网络,当然也可以用来转发服务器请求至本地。

参考链接::
CentOS7搭建ngrok服务器
inconshreveable/ngrok
hteen/ngrok
搭建自己的 Ngrok 服务器, 并与 Nginx 并存
使用Docker部署Ngrok实现内网穿透
Laravel DDNS package,可代替花生壳之类的软件
通过DNSPod API实现动态域名解析
借助dnspod-api定时更新域名解析获取树莓派公网ip
使用Let’s Encrypt生成通配符SSL证书
Letsencrypt使用DNSPOD验证自动更新证书
在 OpenWrt 环境下使用 DnsPod 来实现动态域名解析
利用ssh反向代理以及autossh实现从外网连接内网服务器
How To Configure Nginx with SSL as a Reverse Proxy for Jenkins

HTTP文件分块上传下载

在开发中经常需要上传下载文件,涉及web页面,手机应用,线下服务器等,文件传输方式有HTTP,FTP,BT。。于是基于HTTP开发了统一文件上传下载接口。
由于上传涉及多端,网络状况复杂,需要能够支持断点续传,因此需要对文件进行分块和校验。
请求上传:

  • chunk:当前块编号
  • chunks:文件分块总数
  • md5:整个文件md5
  • content:文件块内容
  • size:文件块大小

服务端返回:

  • statu:状态,0失败,非0成功
  • chunk:需要上传的块编号
  • message:操作信息

服务端有几种情况

  • 1. 上传成功,md5已经存在,说明文件已存在,则返回上传成功,并结束上传,类似秒传
  • 2. 上传成功,md5已经不存在,但当前文件块已经存在,说明该文件已经上传过一部分,则返回成功,并给出需要开始上传的块号,类似断点续传
  • 3. 上传成功,文件块不存在,当前块号小于总块数减一,则返回上传成功,并给出下一块块号
  • 4. 上传成功,文件块不存在,当前块号等于总块数减一,进行合并,校验成功,则返回上传成功,并结束上传
  • 5. 上传成功,文件块不存在,当前块号等于总块数减一,进行合并,校验成功,则返回上传失败,从第一块重新开始上传
  • 6. 上传失败,服务端返回失败,则根据错误信息重传
  • 7. 上传失败,服务端没有返回,则重传当前块

客户端依据自定义的大小对文件进行切割,每次传递一个块,当服务端接收到当前块号为总块数减一则认为全部上传完毕,进行文件块合并,清除临时文件块,计算MD5,如果MD5与传递过来的相等则认为上传成功,否则失败,要求客户端从第一块重传。
这个是基于客户端顺序上传的,假如是并发上传呢?那么就需要在每个分块上传结束后触发合并,需要借助锁来管理。
又拍云表单分块上传则分为3步骤:

  • 1.初始化,上报文件信息
  • 2.上传分块
  • 3.上传结束,触发合并

百度的WebUploader则支持浏览器向服务端的断点续传,利用HTML5或Flash对文件进行分块,计算MD5。
HTTP分块下载,也就是断点续传下载,是根据HTTP1.1协议(RFC2616)中定义的HTTP头 Range和Content-Range字段来控制的:

  • 1. 客户端在HTTP请求头里面指明Range,即开始下载位置
  • 2. 服务端在HTTP响应头里面返回Content-Range,告知下载其实点和范围

服务端可以将文件MD5等加入Etag或自定义Header字段里面,HTTP客户端便可以分开请求数据,最后合并;否则永远都是从头开始。其实也可以把大文件切成多个小文件,再一个个下载回来合并。
有些web服务器直接支持文件上传和下载的断点续传,比如Nginx。

刚才的文件分块传输过程,有点像TCP通信,也有建立连接,分片,校验,重发,断开连接。
而这个将大任务分解为多个小任务进行处理的思想,即准备–>循环(并行)处理–>结束,可以应用到很多项目里面,比如大数据,爬虫。为Web管理系统写了jQuery插件用来处理的耗时任务,将一个耗时任务分解为多个循环请求,避免超时

  • 1. prepare:服务端返任务标示ID,总步骤,及附加参数
  • 2. process:根据返回参数进行循环请求
  • 3. complete:循环完成,触发结束

后面又延伸出另外一个插件,支持任意顺序步骤的处理。

参考链接:
聊聊大文件上传
md5 javascript
HTTP协议--断点续传
http断点续传的秘密
nginx-upload-module模块实现文件断点续传
通过curl测试服务器是否支持断点续传

基于Docker的Nginx + PHP-FPM + Phalcon镜像

上一篇简单介绍了Docker的安装,运行,这一篇来构建一个基于Nginx和PHP-FPM的Phalcon镜像。在官方找了以下,单独的Nginx和PHP镜像更加流行,混合的反倒不是很受欢迎。其实官方并不提倡在一个容器里面运行多个服务,最好是一个容器只对外提供一个服务:一个容器启动时仅仅运行一个命令(其实里面可以包含多个),也方便部署扩展升级。多个服务之间可以使用Docker Compose来管理。但是Docker并不阻止创建包含多个服务器的镜像,为了方便,所以我们仍然可以自己构建。
构建镜像可以有好几种方式,比如基于Alpine Linuxphusion/baseimage-docker构建,或者基于Ubuntu,CentOS等构建,又或者在PHP,Nginx的基础镜像上构建。注意:如果要采用Ubuntu或者CentOS构建,可能需要一些额外的工作,以便保持镜像轻量稳定运行。
这里采用已有的richarvey/nginx-php-fpm来构建,它是一个基于Nginx官方镜像来构建的。
Github上拉取相关文件从Dockerfile构建:

$ sudo git clone https://github.com/ngineered/nginx-php-fpm
$ sudo docker build -t nginx-php-fpm:latest .

关于Dockerfile的相关解释,可以参考这里。当然也可以直接拉取镜像使用

$ sudo docker pull richarvey/nginx-php-fpm
# 也可以直接运行,会自动拉取
#$ sudo docker run -d richarvey/nginx-php-fpm

查看本地的镜像,连单独的nginx也来了:

[email protected]:~# docker images
REPOSITORY          TAG                 IMAGE ID            CREATED             SIZE
nginx-php-fpm       latest              4fc9ac9f2945        7 hours ago         228.5 MB
nginx               mainline-alpine     00bc1e841a8f        5 days ago          54.21 MB

这里的mainline-alpine是指基于Alpine Linux构建的。Alpine Linux是一个仅有5M大小的linux系统,采用apk add/search来安装/查找相应软件,有许多镜像都是基于它构建的,官方PHP镜像也有基于它构建的Docker镜像。
然后运行nginx-php-fpm:

[email protected]:~# docker run --name web -d richarvey/nginx-php-fpm

docker inspect命令用来查看容器的相关信息,查看下分配的IP:

[email protected]:~# docker inspect web | grep IPAddress
            "SecondaryIPAddresses": null,
            "IPAddress": "172.17.0.2",
                    "IPAddress": "172.17.0.2",

然后在浏览器里面访问:http://172.17.0.2/就可以看到phpinfo的页面。到这里,Nginx + PHP的web容器就已经运行起来了,对应的Nginx和PHP进程可以在宿主机器上直接查看:

[email protected]:~# ps aux | grep nginx
root     18167  0.0  0.0  13696  4300 pts/6    S    01:47   0:00 nginx: master process /usr/sbin/nginx
systemd+ 18168  0.0  0.0  14144  1868 pts/6    S    01:47   0:00 nginx: worker process
systemd+ 18169  0.0  0.0  14144  1868 pts/6    S    01:47   0:00 nginx: worker process
systemd+ 18170  0.0  0.0  14144  1868 pts/6    S    01:47   0:00 nginx: worker process
systemd+ 18171  0.0  0.0  14144  1868 pts/6    S    01:47   0:00 nginx: worker process
systemd+ 18172  0.0  0.0  14144  1868 pts/6    S    01:47   0:00 nginx: worker process
root     18190  0.0  0.0  21292  1012 pts/18   S+   01:47   0:00 grep --color=auto nginx
[email protected]:~# ps aux | grep php-fpm
root     18166  0.0  0.2 167880 23364 pts/6    S    01:47   0:00 php-fpm: master process (/etc/php5/php-fpm.conf)
systemd+ 18173  0.0  0.1 167880  8620 pts/6    S    01:47   0:00 php-fpm: pool www
systemd+ 18174  0.0  0.1 167880  8620 pts/6    S    01:47   0:00 php-fpm: pool www
systemd+ 18175  0.0  0.1 167880  8620 pts/6    S    01:47   0:00 php-fpm: pool www
root     18192  0.0  0.0  21292  1032 pts/18   S+   01:47   0:00 grep --color=auto php-fpm

接下来要为这个容器添加Phalcon扩展。首先要进入容器里面,使用docker attach命令进入:

[email protected]:~# docker attach web


结果在这里等了半天进不去。。。。查看下当前镜像入口程序:

[email protected]:~# docker ps
CONTAINER ID        IMAGE               COMMAND             CREATED             STATUS              PORTS               NAMES
94176348a939        nginx-php-fpm       "/start.sh"         6 seconds ago       Up 5 seconds        80/tcp, 443/tcp     web

这个容器启动的时候运行的是start.sh这个脚本,这个脚本运行了Supervisor工具。于是重新启动容器,运行/bin/bash

#终止容器运行
[email protected]:~# docker stop web
web
#删除容器
[email protected]:~# docker rm web
web
#重新运行
[email protected]:~# docker run --name web -d -t -i nginx-php-fpm /bin/bash
ea21e10df702644a83ed75930b30c7764a786c4feabdf17cd868f86640137c47
[email protected]:~# docker ps
CONTAINER ID        IMAGE               COMMAND             CREATED             STATUS              PORTS               NAMES
ea21e10df702        nginx-php-fpm       "/bin/bash"         6 seconds ago       Up 5 seconds        80/tcp, 443/tcp     web
[email protected]:~# docker attach web
#进来了
bash-4.3# ls
bin       etc       lib       media     proc      run       srv       sys       usr
dev       home      linuxrc   mnt       root      sbin      start.sh  tmp       var

就可以进去了。
先安装编译相关工具包:

bash-4.3# apk --no-cache add php5-dev
bash-4.3# apk --no-cache add gcc
bash-4.3# apk --no-cache add make
bash-4.3# apk --no-cache add autoconf
bash-4.3# apk --no-cache add libc-dev
fetch http://dl-cdn.alpinelinux.org/alpine/v3.4/main/x86_64/APKINDEX.tar.gz
fetch http://dl-cdn.alpinelinux.org/alpine/v3.4/community/x86_64/APKINDEX.tar.gz
(1/2) Installing musl-dev (1.1.14-r12)
(2/2) Installing libc-dev (0.7-r0)
OK: 334 MiB in 106 packages

编译安装Phalcon:

bash-4.3# cd /home
bash-4.3# git clone --depth=1 git://github.com/phalcon/cphalcon.git
bash-4.3# cd cphalcon/build
bash-4.3# ./install
bash-4.3# ls -la /usr/lib/php5/modules/ | grep phalcon
-rwxr-xr-x    1 root     root       5045264 Sep 28 17:34 phalcon.so

更改PHP扩展的配置:

bash-4.3# cd /etc/php5/conf.d/
bash-4.3# vi phalcon.ini
#添加以下内容
#extension=phalcon.so

#检查扩展是否加载成功
bash-4.3# php -i | grep phalcon
/etc/php5/conf.d/phalcon.ini,
phalcon
phalcon => enabled
phalcon.db.escape_identifiers => On => On
phalcon.db.force_casting => Off => Off
phalcon.orm.cast_on_hydrate => Off => Off
phalcon.orm.column_renaming => On => On
phalcon.orm.enable_implicit_joins => On => On
phalcon.orm.enable_literals => On => On
phalcon.orm.events => On => On
phalcon.orm.exception_on_failed_save => Off => Off
phalcon.orm.ignore_unknown_columns => Off => Off
phalcon.orm.late_state_binding => Off => Off
phalcon.orm.not_null_validations => On => On
phalcon.orm.virtual_foreign_keys => On => On
OLDPWD => /home/cphalcon/build
_SERVER["OLDPWD"] => /home/cphalcon/build
_ENV["OLDPWD"] => /home/cphalcon/build

加载成功了,需要保持本次镜像变更。首先退出容器:

bash-4.3# cd /home
#删除各种不必要的东西,比如gcc
bash-4.3# rm -rf cphalcon/
bash-4.3# exit
exit

然后查看版本并提交变更:

[email protected]:~# docker ps -l
CONTAINER ID        IMAGE               COMMAND             CREATED             STATUS                     PORTS               NAMES
ea21e10df702        nginx-php-fpm       "/bin/bash"         31 minutes ago      Exited (0) 6 seconds ago                       web
[email protected]:~# docker commit ea2 nginx-php-fpm:phalcon
sha256:bb388df328ecc33fac02dba69759d5c992a145f650a0e5b20ca29a4b122fa933

docker commit命令可以用来提交变更,ea2是container id的前三位,也可以写全;然后跟的是要提交的镜像。这里提交到phalcon这个标签下,以便与原来的区分开。查看所有镜像,发现有两个不同的标签:

[email protected]:~# docker images
REPOSITORY          TAG                 IMAGE ID            CREATED             SIZE
nginx-php-fpm       phalcon             bb388df328ec        11 seconds ago      364.4 MB
nginx-php-fpm       latest              4fc9ac9f2945        4 hours ago         228.5 MB

采用新镜像来运行,这里要讲程序运行入口改回/start.sh,以便能正常启动Nginx和PHP-FPM:

[email protected]:~# docker rm web
web
[email protected]:~# docker run --name web -d -t -i nginx-php-fpm:phalcon /start.sh
deecb19467cda2676b24248e3f55970a2481255c6022a80ffbf5087792ccb559
[email protected]:~# docker ps
CONTAINER ID        IMAGE                   COMMAND             CREATED             STATUS              PORTS               NAMES
deecb19467cd        nginx-php-fpm:phalcon   "/start.sh"         4 seconds ago       Up 3 seconds        80/tcp, 443/tcp     web

入口程序改变了,需要再提交一次变更:

[email protected]:~# docker stop web
web
[email protected]:~# docker ps -l
CONTAINER ID        IMAGE                   COMMAND             CREATED             STATUS                       PORTS               NAMES
c7600e62733d        nginx-php-fpm:phalcon   "/start.sh"         34 seconds ago      Exited (137) 8 seconds ago                       web
[email protected]:~# docker commit c76 nginx-php-fpm:phalcon
sha256:1c97ee169a551dd8441f42b40beafd102c71f3e887e2317dc11ce0ef136ceaf0

运行最终的镜像:

[email protected]:~# docker rm web
web
[email protected]:~# docker run --name web -d -t -i nginx-php-fpm:phalcon
cb5b0c9e55913a538539e46c53ac7905b21def84a05eb00ef81c4b500853576c
[email protected]:~# docker ps
CONTAINER ID        IMAGE                   COMMAND             CREATED             STATUS              PORTS               NAMES
cb5b0c9e5591        nginx-php-fpm:phalcon   "/start.sh"         4 seconds ago       Up 3 seconds        80/tcp, 443/tcp     web

访问http://172.17.0.2/,便可以在页面找到phalcon扩展。
通常我们会将程序和数据分开,挂载外部文件目录到容器里面去:

[email protected]:~# docker stop web
web
[email protected]:~# docker rm web
web
[email protected]:~# docker run --name web -d -t -i -v /home/docker/nginx-php-fpm/src:/var/www/html/ nginx-php-fpm:phalcon
ffd64793fe8e7a2a95b68f514e221b7ec3b6cadfe668c016f55a7bb6d48bc702

-v参数可以用来挂载目录或者文件,可以又多个-v参数。
刚才容器里面做的那些已经添加到Dockerfile里面去,你直接使用它来构建。
至此Nginx + PHP-FPM + Phalcon镜像构建完成,介绍绍了如何进入容器,提交变更,网络访问和文件挂载。

参考链接:
A minimal Ubuntu base image modified for Docker-friendliness
eboraas/phalcon
基于Docker的PHP开发环境
Docker for PHP Developers
Docker在PHP项目开发环境中的应用
使用 Supervisor 来管理进程
PHP C扩展框架Phalcon
Alpine Linux,一个只有5M的Docker镜像

PHP C扩展框架Phalcon

Phalcon是一个C语言写的高性能PHP框架,相比PHP写的框架,它作为PHP的扩展在进程开启时便加载了,节省了每一次请求时的类库加载、MVC框架分派的开销。前面提到的使用Zephir来开发PHP扩展也是这个项目贡献的。
在CentOS 上安装Phalcon,因为之前安装过zephire了,所以直接下载cphalcon来编译安装就可以了,可以参照这里安装所需其他lib

git clone --depth=1 git://github.com/phalcon/cphalcon.git
cd cphalcon/build/
sudo ./install

sudo vim /etc/php.d/phalcon.ini

创建phalcon.ini增加以下内容

[phalcon]
extension=phalcon.so

这里单独把phalcon.ini单独配置,是因为Phalcon扩展加载要在PDO扩展之后,而我的PDO也是单独配置的。如果不是的话会提示这个错误:

$ php -m | grep phalcon
PHP Warning:  PHP Startup: Unable to load dynamic library '/usr/lib64/php/modules/phalcon.so' - /usr/lib64/php/modules/phalcon.so: undefined symbol: php_pdo_get_dbh_ce in Unknown on line 0

Zend Framwork类似,Phalcon也提供开发工具用于快速生成项目骨架

git clone https://github.com/phalcon/phalcon-devtools.git
cd phalcon-devtools
./phalcon.sh
sudo ln -s ~/phalcon-devtools/phalcon.php /usr/bin/phalcon
sudo chmod ugo+x /usr/bin/phalcon

phalcon commands

注意,这个开发工具也是需要依赖Phalcon扩展的,否则会提示

$ phalcon command
PHP Fatal error:  Class 'Phalcon\Script' not found in /home/vagrant/phalcon-devtools/phalcon.php on line 40
PHP Stack trace:
PHP   1. {main}() /home/vagrant/phalcon-devtools/phalcon.php:0

生成一个测试项目store

phalcon scaffold store

按照官方的Nginx说明配置

server {

    listen   8005;
    server_name store.localhost;

    index index.php index.html index.htm;
    set $root_path '/usr/share/nginx/html/tutorial/store/public';
    root $root_path;

    try_files $uri $uri/ @rewrite;

    location @rewrite {
        rewrite ^/(.*)$ /index.php?_url=/$1;
    }

    location ~ \.php {
        fastcgi_pass unix:/tmp/php5-fpm.sock;
        fastcgi_index /index.php;

        include fastcgi.conf;

        fastcgi_split_path_info       ^(.+\.php)(/.+)$;
        fastcgi_param PATH_INFO       $fastcgi_path_info;
        fastcgi_param PATH_TRANSLATED $document_root$fastcgi_path_info;
        fastcgi_param SCRIPT_FILENAME $document_root$fastcgi_script_name;
    }

    location ~* ^/(css|img|js|flv|swf|download)/(.+)$ {
        root $root_path;
    }

    location ~ /\.ht {
        deny all;
    }
}

访问一下192.168.33.14:8005,提示:Access denied。。。查看Nginx错误日志

[[email protected] nginx]# tail -n 20 error.log
2015/07/28 03:41:42 [error] 7343#0: *1 FastCGI sent in stderr: "Access to the script '/usr/share/nginx/html/tutorial/store/public' has been denied (see security.limit_extensions)" while reading response header from upstream, client: 192.168.33.1, server: store.localhost, request: "GET / HTTP/1.1", upstream: "fastcgi://unix:/tmp/php5-fpm.sock:", host: "192.168.33.14:8005"

一开始还以为是PHP-FPM配置security.limit_extensions引起的,后来发现这个这个参数默认就是注释掉的,没限制。 最后在这里找到答案:原来是之前安装Nginx时配置了:cgi.fix_pathinfo=0,将它改回1(默认值)就可以了。当这个参数为1时,会把 PATH_TRANSLATED 转换为 SCRIPT_FILENAME。当然把这个参数去掉也是可以的

        ;fastcgi_param SCRIPT_FILENAME $document_root$fastcgi_script_name;

重启Nginx

sudo service nginx restart

与其他PHP框架一样,Phalcon 支持MVC应用开发,提供了诸多组件如,数据库,缓存,队列等。
Phalcon\DI 作为全局的服务管理,用于服务注册,比如数据库,缓存,文件等。将这些资源统一起来管理,以便其他地方可以调用,各个需要的地方不再需要是new 一个对象,解除耦合关系。
Phalcon\Events\Manager作为全局的事件管理,用于事件注册,触发,以便自定义消息通知,如数据库查询事件,初始化事件。
Phalcon还有一个比较有特色的地方支持注释解析: Phalcon\Annotations 。官方教程举例如何使用注释做输出缓存。首先在Dispatcher服务中注册一个监听dispactch事件的缓存插件

<?php

$di['dispatcher'] = function () {

    $eventsManager = new \Phalcon\Events\Manager();

    // 添加插件到dispatch事件中
    $eventsManager->attach('dispatch', new CacheEnablerPlugin());

    $dispatcher = new \Phalcon\Mvc\Dispatcher();
    $dispatcher->setEventsManager($eventsManager);
    return $dispatcher;
};

然后实现监听的缓存插件

<?php

/**
 * 为视图启动缓存,如果被执行的action带有@Cache 注释单元。
 *
 */
class CacheEnablerPlugin extends \Phalcon\Mvc\User\Plugin
{

    /**
     * 这个事件在dispatcher中的每个路由被执行前执行
     *
     */
    public function beforeExecuteRoute($event, $dispatcher)
    {

        // 解析目前访问的控制的方法的注释
        $annotations = $this->annotations->getMethod(
            $dispatcher->getActiveController(),
            $dispatcher->getActiveMethod()
        );

        // 检查是否方法中带有注释名称‘Cache’的注释单元
        if ($annotations->has('Cache')) {

            // 这个方法带有‘Cache’注释单元
            $annotation = $annotations->get('Cache');

            // 获取注释单元的‘lifetime’参数
            $lifetime = $annotation->getNamedParameter('lifetime');

            $options = array('lifetime' => $lifetime);

            // 检查注释单元中是否有用户定义的‘key’参数
            if ($annotation->hasNamedParameter('key')) {
                $options['key'] = $annotation->getNamedParameter('key');
            }

            // 为当前dispatcher访问的方法开启cache
            $this->view->cache($options);
        }

    }

}

现在就可以使用注释来进行缓存了

<?php

class NewsController extends \Phalcon\Mvc\Controller
{

    public function indexAction()
    {

    }

    /**
     * This is a comment
     *
     * @Cache(lifetime=86400)
     */
    public function showAllAction()
    {
        $this->view->article = Articles::find();
    }

    /**
     * This is a comment
     *
     * @Cache(key="my-key", lifetime=86400)
     */
    public function showAction($slug)
    {
        $this->view->article = Articles::findFirstByTitle($slug);
    }

}

为Action增加了缓存,但对Action的代码改动为0(无侵入)并且非常简洁。数据模型里面也可以使用注释来对字段进行处理

<?php

use Phalcon\Mvc\Model;

class Robots extends Model
{
    /**
     * @Primary
     * @Identity
     * @Column(type="integer", nullable=false)
     */
    public $id;

    /**
     * @Column(type="string", length=70, nullable=false)
     */
    public $name;

    /**
     * @Column(type="string", length=32, nullable=false)
     */
    public $type;

    /**
     * @Column(type="integer", nullable=false)
     */
    public $year;
}

路由解析也可以使用RouterAnnotations反射来实现

?php

/**
 * @RoutePrefix("/api/products")
 */
class ProductsController
{

    /**
     * @Get("/")
     */
    public function indexAction()
    {

    }

    /**
     * @Get("/edit/{id:[0-9]+}", name="edit-robot")
     */
    public function editAction($id)
    {

    }

    /**
     * @Route("/save", methods={"POST", "PUT"}, name="save-robot")
     */
    public function saveAction()
    {

    }

    /**
     * @Route("/delete/{id:[0-9]+}", methods="DELETE",
     *      conversors={id="MyConversors::checkId"})
     */
    public function deleteAction($id)
    {

    }

    public function infoAction($id)
    {

    }

}

是不是跟Java annotation有点像?之前介绍的PHPUnit,Zend Framework,还有Symfony 2 Doctrine 2已经在PHP层面上支持,使用ReflectionClass便可实现。
Phalcon也支持创建命令行应用,可以将PHP应用打包成Phar,直接运行,也可以结合命令行颜色进行输出。

参考链接:
Nginx 安装说明(Nginx Installation Notes)
Can’t upgrade to Phalcon 1.3.0
Nginx/PHP-FPM “Access denied.” error
Access denied (403) for PHP files with Nginx + PHP-FPM
Phalcon 开发工具(Phalcon Developer Tools)
IDE autocomplete for PhalconPHP
Annotations in PHP: They Exist
PHP Annotations Are a Horrible Idea
PHP CLI Colors – PHP Class Command Line Colors (bash)