作者归档:admin

CentOS上安装Nginx+PHP-FPM

Nginx是一个高性能、轻量级的HTTP服务器,占用内存少,稳定性高,也可做为反向代理服务器。Nginx采用事件驱动,在Linux操作系统下,Nginx使用epoll事件模型,充分使用异步逻辑,削减了上下文调度开销,并发服务能力更强。

PHP-FPM是PHP的FastCGI 进程管理器,具有一些高级特性,将PHP进程管理与Web服务器分开,可以分开部署在不同机器上,监听不同的端口和使用不同的 php.ini 配置文件。

PHP-FPM特性之一:fastcgi_finish_request能够在请求完成和刷新数据后,继续在后台执行耗时的工作(录入视频转换、统计处理等),达到分离执行后台任务而又不阻塞PHP快速响应,可作为PHP性能优化点。

PHP-FPM另一特性:可以记录请求当中慢响应的日志,类似Mysql满日志,包括文件名,函数名,行号等,可用于分析PHP的性能问题。

在Apache + mod_php下,每一个请求,Apache便会启动一个进程并加载php解释器来处理。在Nginx + PHP-FPM下,Nginx将PHP请求和环境变量通过socket传递给FastCGI进程;将静态资源请求则缓存到本地并返回。FastCGI 进程管理器采用固定静态(或动态)的子进程来处理请求,占用内存少,具有更好的扩展能力。

在CentOs 6.4上安装Nginx和PHP-FPM:

yum search nginx
sudo yum install nginx
sudo chkconfig --levels 235 nginx on
sudo service nginx start

yum search fpm
sudo yum install php54-fpm

编辑php.ini

sudo vim /etc/php.ini
; cgi.fix_pathinfo provides *real* PATH_INFO/PATH_TRANSLATED support for CGI.  PHP's
; previous behaviour was to set PATH_TRANSLATED to SCRIPT_FILENAME, and to not grok
; what PATH_INFO is.  For more information on PATH_INFO, see the cgi specs.  Setting
; this to 1 will cause PHP CGI to fix its paths to conform to the spec.  A setting
; of zero causes PHP to behave as before.  Default is 1.  You should fix your scripts
; to use SCRIPT_FILENAME rather than PATH_TRANSLATED.
; http://www.php.net/manual/en/ini.core.php#ini.cgi.fix-pathinfo
cgi.fix_pathinfo=0

启动PHP-FPM

chkconfig --levels 235 php-fpm on
service php-fpm start

更改Nginx worker_processes配置

sudo vim /etc/nginx/nginx.conf
worker_processes  4;

更改Nginx 配置以便处理php请求

sudo vim /etc/nginx/conf.d/default.conf
server {
    listen       80 default_server;
    server_name  _;

    #charset koi8-r;

    #access_log  logs/host.access.log  main;

    # Load configuration files for the default server block.
    include /etc/nginx/default.d/*.conf;

    location / {
        root   /usr/share/nginx/html;
        index  index.html index.htm;
    }

    error_page  404              /404.html;
    location = /404.html {
        root   /usr/share/nginx/html;
    }

    # redirect server error pages to the static page /50x.html
    #
    error_page   500 502 503 504  /50x.html;
    location = /50x.html {
        root   /usr/share/nginx/html;
    }

    # proxy the PHP scripts to Apache listening on 127.0.0.1:80
    #
    #location ~ \.php$ {
    #    proxy_pass   http://127.0.0.1;
    #}

    # pass the PHP scripts to FastCGI server listening on 127.0.0.1:9000
    #
    location ~ \.php$ {
        root           /usr/share/nginx/html;
        #fastcgi_pass   127.0.0.1:9000;
        fastcgi_pass   unix:/tmp/php5-fpm.sock;
        fastcgi_index  index.php;
        fastcgi_param  SCRIPT_FILENAME  /scripts$fastcgi_script_name;
        include        fastcgi.conf;
    }

    # deny access to .htaccess files, if Apache's document root
    # concurs with nginx's one
    #
    #location ~ /\.ht {
    #    deny  all;
    #}
}

编辑PHP-FPM

sudo vim /etc/php-fpm.d/www.conf
; List of ipv4 addresses of FastCGI clients which are allowed to connect.
; Equivalent to the FCGI_WEB_SERVER_ADDRS environment variable in the original
; PHP FCGI (5.2.2+). Makes sense only with a tcp listening socket. Each address
; must be separated by a comma. If this value is left blank, connections will be
; accepted from any ip address.
; Default Value: any
;listen.allowed_clients = 127.0.0.1
listen = /tmp/php5-fpm.sock

; Set permissions for unix socket, if one is used. In Linux, read/write
; permissions must be set in order to allow connections from a web server. Many
; BSD-derived systems allow connections regardless of permissions.
; Default Values: user and group are set as the running user
;                 mode is set to 0660
listen.owner = nginx
listen.group = nginx
listen.mode = 0660

; Unix user/group of processes
; Note: The user is mandatory. If the group is not set, the default user's group
;	will be used.
; RPM: apache Choosed to be able to access some dir as httpd
user = nginx
; RPM: Keep a group allowed to write in log dir.
group = nginx

重启PHP-FPM

sudo service php-fpm restart

创建PHP页面

sudo vim /usr/share/nginx/html/info.php
<?php
phpinfo();

重启Nginx

sudo service nginx restart
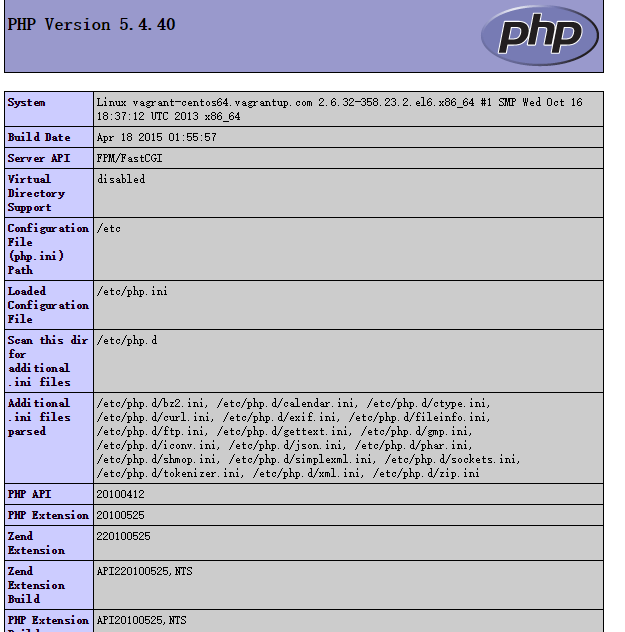
测试PHP是否正确处理。
php-fpm

参考链接:
Nginx and PHP-FPM Configuration and Optimizing Tips and Tricks
nginx
FastCGI 进程管理器(FPM)
Apache + mod_php compared to Nginx + php-fpm
Which PHP mode? Apache vs CGI vs FastCGI
PHP: What are the advantages of FastCGI over mod_php?
What are the advantages of using PHP-FPM + Nginx over Apache and mod_php?
How To Install Nginx With PHP5 (And PHP-FPM) And MySQL Support On CentOS 6.5
How To Install Linux, nginx, MySQL, PHP (LEMP) stack on CentOS 6
Linux上配置Nginx+PHP5(FastCGI)
使用fastcgi_finish_request提高页面响应速度
善用php-fpm的慢执行日志slow log,分析php性能问题
swoole之代码热更新实现

PHP 扩展开发之Zephir

最近对代码进行性能分析后,发现两个耗时的地方:自动加载文件数太多;参数验证函数调用超过1000次。这也是许多php语言框架面临的问题,所以发展出来诸如YafSwoolePhalcon这些C语言扩展框架,或者类似workermanreactphpphpdaemon这些一次加载的框架。总之减少加载文件,使用内置函数,减少损耗,以提升性能。
相比之下,PHP扩展的框架性能还是要比PHP语言框架还要好不少。以往PHP扩展的开发方式就是C/C++SWIG,现在还多了一个选择:zephir,从Phalcon发展出来的项目,采用类似PHP语法的中间语言,将代码编译为高性能的C扩展。zephir支持面向对象编程,变量类型除了类似PHP的动态类型,还支持静态类型(有点像FackBook的hack了),而且可以调用php内置或其他C扩展的函数。zephir编译流程如下
scheme
整个过程是zephir和底层编译器自动进行编译优化的,当然也可以自己调整以获得更好的性能。
在ubuntu下的安装如官方教程即可,在centos下的安装如下

su -c 'yum update'
sudo yum install -y wget 
sudo yum install -y vim 
sudo yum install -y libtool
sudo yum install -y gcc 
sudo yum install -y make 
sudo yum install -y re2c

sudo rpm -Uvh https://mirror.webtatic.com/yum/el6/latest.rpm
sudo yum install -y php55w 
sudo yum install -y php55w-devel 
sudo yum install -y php55w-json

sudo yum install -y git-core 

git clone https://github.com/json-c/json-c.git
cd json-c
./autogen.sh
./configure
make
make install

git clone https://github.com/phalcon/zephir
cd zephir
./install -c
zephir help

安装完成如下:
zephir10
按照教程创建示例:

zephir init utils
cd utils
sudo vim utils/greeting.zep

greeting.zep代码如下:

namespace Utils;

class Greeting
{

    public static function say()
    {
        echo "hello world!";
    }

}

编译安装

$ zephir build

注意,我在php5.3下面这么编译都不行,在php5.5/php5.4的版本基本没有碰到什么问题。
然后更改php.ini:

sudo vim /etc/php.ini

在php.ini中加上以下内容

;zephir编译的扩展需要依赖json.so,需要提前加载
[json]
;如果php.ini中没有则加上,有则去掉;
extension=json.so

[utils]
extension=utils.so 

查看php可用扩展

php -i

注意:如果提示’undefined symbol: php_json_decode_ex in Unknown on line 0’,则是php json扩展未加载,在php.ini打开就行了。加载了json.so后又提示’PHP Warning: Module ‘json’ already loaded’,则是已经在其他地方加载了该扩展,找出并注释掉。我的是在php.d下面的json.ini里面:

sudo vim /etc/php.d/json.ini
[json]
;已经在php.ini中加载了,为避免重复加载注释掉
;extension = json

加载成功后的效果:
zephir3
创建一个php脚本来试一下

cd ~/utils
sudo vim greeting.php

greeting.php代码如下:

<?php

echo Utils\Greeting::say(), "\n";

保存并运行:
zephir11
zephir5
zephir6
至此你的zephir编译的扩展已经成功了,赶紧翻译你的PHP代码去吧。
参考这篇教程,计算斐波拉契数列在我的环境下是这样的:
zephir13
性能提升还是挺明显的,而且在静态类型(强类型)下面还能比动态类型再提升。

参考链接:
开源的 PHP 轻量级框架 iphp
自己写PHP扩展之创建一个类
快速开发一个PHP扩展
CentOS 5 or CentOS 6 Upgrade PHP to PHP 5.4 or PHP 5.5
PHP 開發者應該將 Zephir 列為重要觀察的專案
Hack: a new programming language for HHVM
PHP-CPP
Getting Started with PHP Extension Development via Zephir
Quick Tip: Install Zephir and Phalcon 2 on Vagrant

PHP 输出控制

最近提交完代码后,发现Firephp在其他人的环境下又出问题了,提示:’Headers already sent in …’,与上一次Nginx 缓冲区超出不太一样。查看Nginx错误日志,并没有发现错误,并且有同学发现Apache下面也会,怀疑是PHP的问题。但是我用的也是Apache,并不会出现问题!偶然发现有一个页面不会出现错误提示,发现该页面输出内容大小在1KB左右,怀疑是PHP的输出缓冲区超出时,自动发送缓冲区数据,导致后续Firephp通过Http header发送调试信息失败了并结束php脚本执行。

注释掉模板渲染后的输出语句,不再提示该错误,确定是php的缓冲输出有问题。比较不同环境下的php.ini,发现output_buffering的值不太一样,我的值是On,而其他人则是默认值4096。

; Output buffering is a mechanism for controlling how much output data
; (excluding headers and cookies) PHP should keep internally before pushing that
; data to the client. If your application's output exceeds this setting, PHP
; will send that data in chunks of roughly the size you specify.
; Turning on this setting and managing its maximum buffer size can yield some
; interesting side-effects depending on your application and web server.
; You may be able to send headers and cookies after you've already sent output
; through print or echo. You also may see performance benefits if your server is
; emitting less packets due to buffered output versus PHP streaming the output
; as it gets it. On production servers, 4096 bytes is a good setting for performance
; reasons.
; Note: Output buffering can also be controlled via Output Buffering Control
;   functions.
; Possible Values:
;   On = Enabled and buffer is unlimited. (Use with caution)
;   Off = Disabled
;   Integer = Enables the buffer and sets its maximum size in bytes.
; Note: This directive is hardcoded to Off for the CLI SAPI
; Default Value: Off
; Development Value: 4096
; Production Value: 4096
; http://php.net/output-buffering
output_buffering = On

根据上面的解释,当output_buffering为On或者4096时,在每次请求里面,当我们使用echo或print的时候,php实际上并不立即输出而是先保存到缓冲区里面去,当达到一定大小(如4KB)或脚本执行结束的时候,再向浏览器输出缓冲区内容并清空。

Http协议传输内容时,先传输响应头,一旦内容开始输出后,响应头不再可以改变。当output_buffering为On时,PHP会将所有的输出缓存起来,等待请求结束时在向浏览器输出内容,故Firephp在最后时刻更改Http响应头仍然不会存在问题,因为此时仍输出任何内容;当output_buffering为4096(或其他固定值)时,每次php缓冲区一满便会向客户端输出,此时已输出内容,响应头不再可以改变,若尝试设置header便会提示:’Headers already sent…’。

做好Webserver的缓冲输出控制,能够带来更好的用户体验,如Facebook新浪的Bigpipe。

本次的问题排查发现,由于大部分页面的调试信息较多,导致Http响应头较大(远大于4KB,有的达到36KB),所以触发了自动输出机制。解决办法:更改output_buffering为On;在代码里面手动ob_start();更改output_buffering为更大值;减少日志调试信息。

参考链接:
PHP Output Buffering Control
PHP Streaming and Output Buffering Explained
What is output buffering?
php flush
加速PHP的ECHO
BigPipe: Pipelining web pages for high performance
新浪微博的BigPipe后端实现技术分享
BigPipe学习研究
分块传输编码

PHP性能分析之xhprof

xdebug讲到了使用xdebug对php程序进行性能分析,这里再介绍另外一个工具:xhprof,facebook出品。xhprof是一个函数级别的分层性能报告工具,包括调用次数,阻塞时间,CPU时间和内存使用情况。
首先,下载并安装xhprof扩展

tar -zxvf xhprof-0.9.4.tgz 
cd xhprof-0.9.4
/usr/local/php/bin/phpize
./configure --with-php-config=/usr/local/php/bin/php-config
make
make install
#拷贝扩展
cp /usr/local/php/lib/php/extensions/no-debug-non-zts-20100525/xhprof.so /usr/local/php/lib/php/extensions/

mkdir -p /tmp/xhprof
chmod 755 /tmp/xhprof
chown www:www /tmp/xhprof

xhprof自带的界面工具比较简单,这里推荐使用另外一个UI:XHProf.io。下载解压到web目录下面,重命名/xhprof/includes/目录下的config.inc.sample.php为/xhprof/includes/config.inc.php,并更改文件:

return array(
	'url_base' => 'http://192.168.84.2:8502/', //本地的XHProf.io站点
	'url_static' => null, // When undefined, it defaults to $config['url_base'] . 'public/'. This should be absolute URL.
	'pdo' => new PDO('mysql:dbname=test;host=192.168.84.3;charset=utf8', 'root', 'root') //本地的数据库配置,只支持PDO
);

在test数据库上运行/xhprof/setup/database.sql,创建性能检测相关的表结构。
由于XHProf会去github上检测版本,国内访问较慢,建议不要检测。更改/xhprof/includes/bootstrap.inc.php如下:

	curl_setopt_array($ch, array(
		CURLOPT_URL => 'http://192.168.84.2:8502/version.json', //本地的XHProf.io站点下面
		CURLOPT_HEADER => FALSE,
		CURLOPT_RETURNTRANSFER => TRUE
	));

然后更改php.ini配置,在最后加上以下内容:

;xhprof
[xhprof]
extension=xhprof.so;
xhprof.output_dir=/tmp/xhprof

; Automatically add files before PHP document.
; XHProf.io站点下的prepend.php
auto_prepend_file = /usr/local/nginx/xhprof/inc/prepend.php

; Automatically add files after PHP document.
; XHProf.io站点下的append.php
auto_append_file = /usr/local/nginx/xhprof/inc/append.php

auto_prepend_file为每次php脚本运行前,自动加载并运行的文件;auto_append_file为每次php脚本运行后,自动加载并运行的文件。这样可以省去每次在需要检测的php文件里面写xhprof_enable/xhprof_disable等调用代码,不必更改原有代码(无侵入)。
注意:如果你访问了php页面却收集不到情况,可能是你的代码里面写了exit/die终止了程序执行,导致auto_append_file未加载执行,去掉exit/die就可以了。另外,如果提示:Unexpected system behaviour,可能是数据库连接不上,PDO、mbstring扩展未安装,响应数据里面带有错误信息的等等。

重启php-fpm:

#重启php-fpm
kill -USR2 `cat /usr/local/php/var/run/php-fpm.pid`

xhprof1

访问该服务器上php页面,即可以在http://192.168.84.2:8502/看到检测情况。
xhprof5
xhprof4
xhprof6

参数说明
Inclusive Time 包括子函数所有执行时间。
Exclusive Time/Self Time 函数执行本身花费的时间,不包括子树执行时间。
Wall Time 花去了的时间或挂钟时间。
CPU Time 用户耗的时间+内核耗的时间
Inclusive CPU 包括子函数一起所占用的CPU
Exclusive CPU 函数自身所占用的CPU

参考链接:
给CentOS6.3 + PHP5.3 安装PHP性能测试工具 XHProf-0.9.2
xhprof.io/INSTALL.md
php auto_append_file

PHP性能分析之Xdebug

最近一个PHP程序性能跑的不行,于是又想起来Xdebug这个扩展,并记录一下。
首先去Xdebug官网下载源码包,注意下载对应版本的源码包,我的环境是PHP 5.4.9,安装了最新的Xdebug 2.3.2后,不能使用WinCacheGrindWebGrind进行分析,又重新下载了旧的Xdebug 2.2.0。
然后在Centos下面编译安装

tar -zxvf xdebug-2.2.0.tgz
cd xdebug-2.2.0
/usr/local/php/bin/phpize
./configure --enable-xdebug --with-php-config=/usr/local/php/bin/php-config
make
make install

编译安装完成后是这样子的
xdebug
将xdebug扩展复制到php的扩展目录下,并创建/tmp/xdebug文件。

cp /usr/local/php/lib/php/extensions/no-debug-non-zts-20100525/xdebug.so /usr/local/php/lib/php/extensions/
mkdir -p /tmp/xdebug
chmod 755 /tmp/xdebug
chown www:www /tmp/xdebug

并更改php.ini如下

; XDEBUG Extension

zend_extension = "/usr/local/php/lib/php/extensions/xdebug.so"
[xdebug]
xdebug.profiler_enable = on
xdebug.trace_output_dir="/tmp/xdebug"  
xdebug.profiler_output_dir="/tmp/xdebug" 
xdebug.profiler_output_name = cachegrind.out.%t.%p

然后需要重启php-fpm,使配置生效。

这个环境下并没有php-fpm的pid文件,每次重启需要查找进程pid,于是先生成下。

#查找进程id
ps aux | grep php-fpm  
#结束进程
kill 6369

编辑/usr/local/php/etc/php-fpm.conf如下,去掉注释

[global]
; Pid file
; Note: the default prefix is /usr/local/php/var
; Default Value: none
pid = run/php-fpm.pid

然后启动php-fpm

#启动php-fpm
/usr/local/php/sbin/php-fpm -c /usr/local/php/lib/php.ini -y /usr/local/php/etc/php-fpm.conf

以后就可以方便的重启php-fpm了。

 
#关闭php-fpm
kill -INT `cat /usr/local/php/var/run/php-fpm.pid`
 
#重启php-fpm
kill -USR2 `cat /usr/local/php/var/run/php-fpm.pid`

重启完成后,查看phpinfo,Xdebug是否加载成功。
xdebug2
运行php程序就会在/tmp/xdebug目录下,生成对应的profile文件(cachegrind.out.%t.%p),这里可以使用WinCacheGrindWebGrind进行分析。
Windows下面使用WinCacheGrind进行分析,可以查看PHP执行流程,函数调用次数、耗时。双击列表可以进入详细调用情况。
xdebug3
xdebug6
WebGrind程序部署在安装Xdebug的服务器上即可,会显示已经生成的profile文件,下拉选择进行分析。也可以查看PHP执行流程,函数调用次数、耗时。点击小三角会展开调用栈,后面跟着源码位置,可直接定位查看代码。
xdebug4

参考链接:
前端开发中的性能那点事(一)巧用xdebug
利用Xdebug分析PHP程序,找出性能瓶颈[原创]
php-fpm – 启动参数及重要配置详解