一直以来都是使用Vagrant与VirtualBox运行CentOS系统来搭建环境,然而有一天突然出现Windows下面的目录无法映射进去了,报错:
D:\project\vagrant\centos64php56>vagrant up
Bringing machine 'default' up with 'virtualbox' provider...
==> default: Clearing any previously set forwarded ports...
==> default: Clearing any previously set network interfaces...
==> default: Preparing network interfaces based on configuration...
  default: Adapter 1: nat
  default: Adapter 2: hostonly
==> default: Forwarding ports...
  default: 80 (guest) => 8080 (host) (adapter 1)
  default: 22 (guest) => 2222 (host) (adapter 1)
==> default: Booting VM...
==> default: Waiting for machine to boot. This may take a few minutes...
  default: SSH address: 127.0.0.1:2222
  default: SSH username: vagrant
  default: SSH auth method: private key
  default: Warning: Connection reset. Retrying...
  default: Warning: Connection aborted. Retrying...
  default: Warning: Connection reset. Retrying...
  default: Warning: Remote connection disconnect. Retrying...
==> default: Machine booted and ready!
[default] GuestAdditions versions on your host (5.1.26) and guest (4.3.6) do not matc
Loaded plugins: fastestmirror
Setting up Install Process
Loading mirror speeds from cached hostfile
 * base: mirrors.btte.net
 * epel: repo.fedoralinux.ir
 * extras: mirrors.btte.net
 * updates: mirrors.btte.net
No package kernel-devel-2.6.32-358.23.2.el6.x86_64 available.
Package gcc-4.4.7-18.el6.x86_64 already installed and latest version
Package binutils-2.20.51.0.2-5.47.el6_9.1.x86_64 already installed and latest version
Package 1:make-3.81-23.el6.x86_64 already installed and latest version
Package 4:perl-5.10.1-144.el6.x86_64 already installed and latest version
Package bzip2-1.0.5-7.el6_0.x86_64 already installed and latest version
Nothing to do
Copy iso file C:\Program Files\Oracle\VirtualBox\VBoxGuestAdditions.iso into the box
Installing Virtualbox Guest Additions 5.1.26 - guest version is 4.3.6
Verifying archive integrity... All good.
Uncompressing VirtualBox 5.1.26 Guest Additions for Linux...........
VirtualBox Guest Additions installer
Removing installed version 5.1.26 of VirtualBox Guest Additions...
vboxadd.sh: Stopping VirtualBox Additions.
Copying additional installer modules ...
Installing additional modules ...
vboxadd.sh: Starting the VirtualBox Guest Additions.
Failed to set up service vboxadd, please check the log file
/var/log/VBoxGuestAdditions.log for details.
An error occurred during installation of VirtualBox Guest Additions 5.1.26. Some func
In most cases it is OK that the "Window System drivers" installation failed.
vboxadd.sh: Starting the VirtualBox Guest Additions.
vboxadd.sh: failed: Look at /var/log/vboxadd-install.log to find out what went wrong.
vboxadd.sh: failed: modprobe vboxguest failed.
==> default: Checking for guest additions in VM...
  default: The guest additions on this VM do not match the installed version of
  default: VirtualBox! In most cases this is fine, but in rare cases it can
  default: prevent things such as shared folders from working properly. If you see
  default: shared folder errors, please make sure the guest additions within the
  default: virtual machine match the version of VirtualBox you have installed on
  default: your host and reload your VM.
  default:
  default: Guest Additions Version: 4.3.6
  default: VirtualBox Version: 5.1
==> default: Configuring and enabling network interfaces...
  default: SSH address: 127.0.0.1:2222
  default: SSH username: vagrant
  default: SSH auth method: private key
==> default: Mounting shared folders...
  default: /home/rc => D:/project/vagrant/centos64php56
Vagrant was unable to mount VirtualBox shared folders. This is usually
because the filesystem "vboxsf" is not available. This filesystem is
made available via the VirtualBox Guest Additions and kernel module.
Please verify that these guest additions are properly installed in the
guest. This is not a bug in Vagrant and is usually caused by a faulty
Vagrant box. For context, the command attempted was:

mount -t vboxsf -o uid=500,gid=500 home_rc_ /home/rc

The error output from the command was:

/sbin/mount.vboxsf: mounting failed with the error: No such device
这里提示虚拟机里CentOS的VBoxGuestAdditions与VirtualBox的版本匹配,需要升级:
[default] GuestAdditions versions on your host (5.1.26) and guest (4.3.6) do not matc
应该是升级了VirtualBox导致的。然而自动安装新插件失败:
vboxadd.sh: Starting the VirtualBox Guest Additions.
Failed to set up service vboxadd, please check the log file
/var/log/VBoxGuestAdditions.log for details.
An error occurred during installation of VirtualBox Guest Additions 5.1.26. Some func
In most cases it is OK that the "Window System drivers" installation failed.
vboxadd.sh: Starting the VirtualBox Guest Additions.
vboxadd.sh: failed: Look at /var/log/vboxadd-install.log to find out what went wrong.
vboxadd.sh: failed: modprobe vboxguest failed.
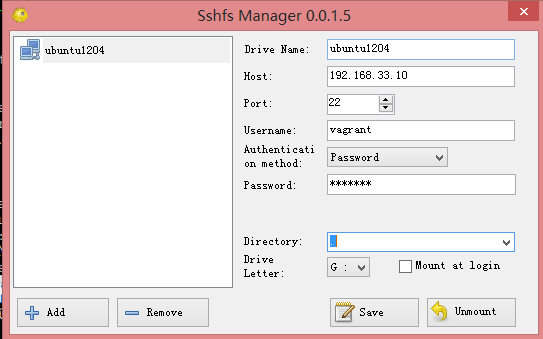
导致共享目录无法映射。但是虚拟机仍然是启动成功的,可以ssh进去,或者使用sftp挂载。
Google了下有说是VirtualBox bug的,也有说是Windows问题的,各种折腾不能解决。升级插件也无效:vagrant plugin install vagrant-vbguest。重新安装VirtualBox和Vagrant,并不会影响现有虚拟机及网络配置,但不能解决问题。
直到看到这篇文章,决定从CentOS入手解决。
启动虚拟机后,使用sftp上传VBoxGuestAdditions.iso,ssh进入手动安装:
$ sudo
$ mount VBoxGuestAdditions.iso -o loop /mnt
$ cd /mnt
$ sh VBoxLinuxAdditions.run
安装失败,查看日志:
Building the main Guest Additions module                   [FAILED]
(Look at /var/log/vboxadd-install.log to find out what went wrong)
vboxadd-install.log日志:
/tmp/vbox.0/Makefile.include.header:97: *** Error: unable to find the sources of your current Linux kernel. Specify KERN_DIR=<directory> and run Make again. Stop.
参照这篇文章,查看kernel版本
$ rpm -qa kernel\* | sort
kernel-2.6.32-358.23.2.el6.x86_64
kernel-devel-2.6.32-696.10.2.el6.x86_64
kernel-firmware-2.6.32-358.10.2.el6.noarch
kernel-headers-2.6.32-696.10.2.el6.x86_64

$ uname -r
2.6.32-358.10.2.el6.x86_64
其实一开始是更多版本不匹配的,尝试更新kernel:
yum update
yum install kernel-headers kernel-devel
结果部分更新失败:
Warning: No matches found for: kernel-devel
No Matches found
参照这里解除版本锁定,设置enabled = 0:
$ vim /etc/yum/pluginconf.d/versionlock.conf
再次运行升级kernel就可以了。安装成功后,重启后,再次运行sh VBoxLinuxAdditions.run 就可以了。事实上Vagrant启动时就会自动安装VBoxGuestAdditions:
[default] GuestAdditions 5.1.26 running --- OK.
Vagrant升级到后发现vagrant up初始化下载box卡住了,那是你的vagrant版本太高与对应的powershell版本对应不上,可以下载最新的powershell安装即可。
如果box下载很慢,可以参照这里的方法自我映射取得url单独下载:
https://app.vagrantup.com/box-cutter/boxes/centos73
==> https://atlas.hashicorp.com/box-cutter/boxes/centos73/versions/2.0.21/providers/virtualbox.box
参考链接:
Guest Additions Version error on VirtualBox5
VirtualBox下挂载共享文件目录问题处理
Resolving GuestAdditions version mismatch in vagrant/homestead vm (failed to mount shared folders / modprobe vboxsf failed)
Problem installing virtualBox guest additions
Warning: No matches found for: kernel-devel
Vagrant up hangs forever on Windows 7, Vagrant 1.9.7, VirtualBox 5.1.22.r11512