标签归档:php

php

PHP 扩展开发之C

前面介绍了使用Zephir来开发PHP扩展,将PHP代码转为扩展,以提升性能,保护代码。目前更多的扩展都是采用C/C++开发的,最近在项目开发中,需要在这些已有的PHP扩展上开发,也只能用C/C++来开发了。

首先去PHP官网下载对应版本的PHP源码,解压并进入对应的目录。
创建扩展courages:

[vagrant@vagrant-centos64 ext]$ ./ext_skel
./ext_skel --extname=module [--proto=file] [--stubs=file] [--xml[=file]]
           [--skel=dir] [--full-xml] [--no-help]

  --extname=module   module is the name of your extension
  --proto=file       file contains prototypes of functions to create
  --stubs=file       generate only function stubs in file
  --xml              generate xml documentation to be added to phpdoc-cvs
  --skel=dir         path to the skeleton directory
  --full-xml         generate xml documentation for a self-contained extension
                     (not yet implemented)
  --no-help          don't try to be nice and create comments in the code
                     and helper functions to test if the module compiled
[vagrant@vagrant-centos64 ext]$ ./ext_skel --extname=courages
Creating directory courages
Creating basic files: config.m4 config.w32 .svnignore courages.c php_courages.h CREDITS EXPERIMENTAL tests/001.phpt courages.php [done].

To use your new extension, you will have to execute the following steps:

1.  $ cd ..
2.  $ vi ext/courages/config.m4
3.  $ ./buildconf
4.  $ ./configure --[with|enable]-courages
5.  $ make
6.  $ ./sapi/cli/php -f ext/courages/courages.php
7.  $ vi ext/courages/courages.c
8.  $ make

Repeat steps 3-6 until you are satisfied with ext/courages/config.m4 and
step 6 confirms that your module is compiled into PHP. Then, start writing
code and repeat the last two steps as often as necessary.

这里的步骤说的很清楚,但这一次,步骤3被phpize代替了。

按部就班,编辑config.m4,PHP_ARG_WITH是采用动态库方式加载(PHP_ARG_ENABLE则是编译内核中,configure是–enable-extension使用),将

dnl PHP_ARG_WITH(courages, whether to enable courages support,
dnl Make sure that the comment is aligned:
dnl [  --with-courages             Include courages support])

更改为

PHP_ARG_WITH(courages, for courages support,
[  --with-courages             Include courages support])

然后,在php_courages.h增加函数声明

PHP_FUNCTION(confirm_courages_compiled);	/* For testing, remove later. */
PHP_FUNCTION(courages_helloworld);

接着,编辑courages.c,在function_entry中增加函数注册

const zend_function_entry courages_functions[] = {
	PHP_FE(confirm_courages_compiled,	NULL)		/* For testing, remove later. */
 	PHP_FE(courages_helloworld,  NULL)
	PHP_FE_END	/* Must be the last line in courages_functions[] */
};

然后是courages_helloworld函数实现

PHP_FUNCTION(courages_helloworld)
{
        char *arg = NULL;
	int arg_len, len;
	char *strg;
	if (zend_parse_parameters(ZEND_NUM_ARGS() TSRMLS_CC, "s", &arg, &arg_len) == FAILURE) {
		return;
	}
	len = spprintf(&strg, 0, "Your input string: %s/n", arg);
	php_printf(strg);
	return SUCCESS;
}

最后就是编译

phpize
./configure
sudo make
sudo make install

sudo vim /etc/php.ini

在php.ini中增加扩展courages.so

[courages]
extension = courages.so

测试一下

[vagrant@vagrant-centos64 courages]$ php -m | grep 'courages'
courages

[vagrant@vagrant-centos64 courages]$ php courages.php
Functions available in the test extension:
confirm_courages_compiled
courages_helloworld

Your input string: hellow world
Congratulations! You have successfully modified ext/courages/config.m4. Module courages is now compiled into PHP.

到这里一个扩展的开发流程就结束了。

这里分享一些小技巧。
首先是如何在PHP扩展中获取PHP全局数组$_SERVER($_POST/GET)变量中的值:

static char *get_server_var_by_name(char *str){
	// This code makes sure $_SERVER has been initialized
	if (!zend_hash_exists(&EG(symbol_table), "_SERVER", 8)) {
		zend_auto_global* auto_global;
		if (zend_hash_find(CG(auto_globals), "_SERVER", 8, (void **)&auto_global) != FAILURE) {
			auto_global->armed = auto_global->auto_global_callback(auto_global->name, auto_global->name_len TSRMLS_CC);
		}
	}

	// This fetches $_SERVER['PHP_SELF']
	zval** arr;
	char* script_name;
	if (zend_hash_find(&EG(symbol_table), "_SERVER", 8, (void**)&arr) != FAILURE) {
		HashTable* ht = Z_ARRVAL_P(*arr);
		zval** val;
		if (zend_hash_find(ht, str, strlen(str)+1, (void**)&val) != FAILURE) {
			script_name = Z_STRVAL_PP(val);
		}
	}
	return script_name;
}

然后是如何在PHP扩展调用PHP函数:

/*调用无参数函数*/
static char *get_sapi_name(){
    zval *function_name;
    zval *retval;
	char *sapi_name;

    MAKE_STD_ZVAL(function_name);
    ZVAL_STRING(function_name , "php_sapi_name", 1);


    if (call_user_function_ex(EG(function_table), NULL, function_name, &retval, 0, NULL, 0, EG(active_symbol_table) TSRMLS_CC) != SUCCESS)
    {
        zend_error(E_ERROR, "Function call failed");
    }

    if (retval != NULL && Z_TYPE_P(retval) != IS_STRING) {
        convert_to_string(retval);
        sapi_name = Z_STRVAL_P(retval);
    }
    else{
	sapi_name = "cli";
    }

    return sapi_name;
}
/*调用有参数函数*/
static int _ck_dir(char *dir TSRMLS_DC)
{
    zval *function_name;
    zval *retval;
    zval *str;
    zval **param[1];

    MAKE_STD_ZVAL(function_name);
    ZVAL_STRING(function_name , "is_dir", 1);

    MAKE_STD_ZVAL(str);
    ZVAL_STRING(str, dir, 1);
    param[0] = &str;

    if (call_user_function_ex(EG(function_table), NULL, function_name, &retval, 1, param, 0, EG(active_symbol_table) TSRMLS_CC) != SUCCESS)
    {
        zend_error(E_ERROR, "Function call failed");
    }

    if (retval != NULL && zval_is_true(retval)) {
        return SUCCESS;
    }

    return FAILURE;
}

更高级的一些技巧可以参考《PHP扩展开发及内核应用》和阅读别人的扩展开发代码。

参考链接:
php扩展实战 —— 获得ip的来源地址
如何编写一个PHP的C扩展
[原创]快速开发一个PHP扩展
用C/C++扩展你的PHP
Get the name of running script from a PHP extension
Build PHP extension and use call_user_function
Programming PHP
与 UNIX 构建系统交互: config.m4
call_user_function_ex() documentation
PHP Extensions Made Eldrich: PHP Variables
Convert Zval to char*
PHP扩展编写第一步:PHP和Zend介绍
PHP扩展开发:简单类实现
自己写PHP扩展之创建一个类[原创]
如何在扩展里调用PHP函数呢?
PHP队列开发之Beanstalk

Beanstalk是一个基于内存的(binlog持久化到硬盘),事件驱动(libevent),简单、快速的任务队列,支持大部分编程语言,将前台的任务转为后台异步处理,为web开发提供更高弹性。它可以支持多个server(客户端支持),一个任务只会被投递到一台server,一个任务只会被一个消费者获取(Reverse)。

相比RabbitMQ,Beanstalk作为一个任务队列,设计比较简单,支持以下特性:

  • 优先级(priority),可以对任务进行优先处理(或降级),越小的值优先级越高(0~4,294,967,295),默认按先进先出(FIFO)
  • 延迟执行(delay),一个任务创建完成并稍后再执行(比如等待主从同步)
  • 超时重试(TTR),一个任务没有在指定时间内完成,将会被重新投递,由其他客户端处理。客户端也可以主动进行延时(touch)或重新入队(release)
  • 隐藏(bury),一个任务执行失败了,可以先隐藏,隐藏的任务可以被重新激活(kick);

一个任务如果没有被删除,那么它就可以被重新获取。下面是大多数任务的生命周期:

   put with delay               release with delay
  ----------------> [DELAYED] <------------.
                        |                   |
                        | (time passes)     |
                        |                   |
   put                  v     reserve       |       delete
  -----------------> [READY] ---------> [RESERVED] --------> *poof*
                       ^  ^                |  |
                       |   \  release      |  |
                       |    `-------------'   |
                       |                      |
                       | kick                 |
                       |                      |
                       |       bury           |
                    [BURIED] <---------------'
                       |
                       |  delete
                        `--------> *poof*

CentOS下安装Beanstalkd

sudo yum install beanstalkd
#启动beanstalk
sudo service beanstalkd start
#beanstalkd -l 192.168.33.14 -p 11300

PHP下面有个C扩展beanstalk库可以使用,基于libbeanstalkclient

git clone https://github.com/bergundy/libbeanstalkclient.git
cd libbeanstalkclient
mkdir m4
#开始编译
sudo ./autogen.sh

#创建libbeanstalkclient.conf,内容为/usr/lib
sudo vim /etc/ld.so.conf.d/libbeanstalkclient.conf
#使配置生效
sudo ldconfig

git clone https://github.com/nil-zhang/php-beanstalk.git
cd php-beanstalk
phpize
./configure
sudo make
sudo make install
sudo vim /etc/php.ini

编辑php.ini增加以下内容

[beanstalk]
extension = "beanstalk.so"

查看是否加载成功

php -m
#加载成功则重启php-fpm
sudo service php-fpm restart

PHP测试代码

<?php
    $bsc = new Beanstalk();

    $bsc->addserver("192.168.33.14", 11300);
    $bsc->addserver("192.168.33.12", 11300);

    $tubes = $bsc->list_tubes();
    print_r($tubes);

    for($i = 0; $i < 10; $i++)
    {
        $key = "key".$i;
        $value = "value".$i;

        $bsc->use($key);
        $bsc->put($key, $value);
        echo "$key\t$value\n";

        $bsc->watch($key);
        $job = $bsc->reserve($key);
        print_r($job);

        if($bsc->bury($job['id'], $key))
            echo "bury ok\n";
        else
            echo "bury failed\n";

        $bsc->kick(100, $key);
        if($bsc->delete($job['id'], $key))
            echo "delete ok\n";
        else
            echo "delete failed \n";

        $bsc->ignore($key);
        echo "\n";
    }

    echo "done\n";

注意由于Beanstalk服务端实现的比较简单,协议特性需要客户端支持,不同的实现可能效果不一样,这个客户端并没有实现延时发送(delay),超时重试(TTR)。需要这些特性建议使用这个库:PHP Beanstalkd。前台生产者创建任务:

<?php
include 'lib/Beanstalk.php';
$bean = Beanstalk::init();
$bean->addServer('192.168.33.14', 11300);
$bean->addServer('192.168.33.12', 11300);
$bean->useTube('my-tube');
$bean->put('Hello World!', 1024);
$bean->put('Hello World!2', 1023);
$bean->put(json_encode(array('what','how')), 1000, 1, 1);

后台消费者处理任务

include 'lib/Beanstalk.php';
$bean = Beanstalk::init();
$bean->addServer('192.168.33.12', 11300);
$bean->addServer('192.168.33.14', 11300);
$bean->watchTube('my-tube');

while (true)
{
	try
	{
		$job = $bean->reserve($timeout = 10);

		/* process job ... */
		var_dump($job);
		//var_dump($job->getMessage());

		$job->delete();
	}
	catch (BeanstalkException $e)
	{
		switch ($e->getCode())
		{
			case BeanstalkException::TIMED_OUT:
				echo "Timed out waiting for a job.  Retrying in 1 second.";
				sleep(1);
				continue;
				break;
			default:
				throw $e;
				break;
		}
	}
}

注意:客户端获取任务(reverse)是阻塞的(blocking),直到超时;同一个队列(tube)的任务按FIFO进行处理(除非指定优先级);任务内容长度不能超过65536;作为内存队列需要注意是否会内存超出,可以快速处理到Mysql。

使用Beanstalk任务队列提升PHP异步处理能力,降低程序耦合度,使前台更专注,后台处理耗时、扩展性任务(也可以使用其他语言开发),使得web架构更具扩展性。

参考链接:
Scalable Work Queues with Beanstalk
Beanstalk Protocol
Frequently Asked Questions for beanstalkd
Getting Started with Beanstalkd
Queue your work
Asynchronous Processing in Web Applications, Part 2: Developers Need to Understand Message Queues

PHP yield应用

PHP 5.5开始新增了神奇的关键字yield,能够从生成器(generators)中返回数据。yield有点像普通函数中的关键字return,但是不会彻底停止函数的执行(普通函数一旦return便不执行了),可以暂停循环并返回值,每一次调用便从中断处继续迭代。生成器可以用于替代循环迭代,每一次调用返回一个生成器对象(generator)

yield能够延迟执行,可以用于对大量数据进行迭代而不用预先在内存中生成数组。例如动态生成一个大数组:

<?php
function xrange($start, $end, $step = 1) {
    for ($i = $start; $i <= $end; $i += $step) {
        yield $i;
    }
}

foreach (xrange(1, 1000000) as $num) {
    echo $num, "\n";
}

$range = xrange(1, 1000000);
var_dump($range); // object(Generator)#1
var_dump($range instanceof Iterator); // bool(true)

利用yield简便、高效的生成fibonacci数列而不是循环或递归

<?php
function fibonacci($count) {
    $prev = 0;
    $current = 1;

    for ($i = 0; $i < $count; ++$i) {
        yield $prev;
        $next = $prev + $current;
        $prev = $current;
        $current = $next;
    }
}

foreach (fibonacci(48) as $i => $value) {
    echo $i , ' -> ' , $value, PHP_EOL;
}

利用yield来循环读取文件,而不需要像file函数那样一次性加载进来,节省内存

<?php
function file_lines($filename) {
    $file = fopen($filename, 'r'); 
    while (($line = fgets($file)) !== false) {
        yield $line; 
    } 
    fclose($file); 
}
 
foreach (file_lines('somefile') as $line) {
    // do some work here
}

yield除了能够返回值,用作变量时还可以接收值。

<?php
function logger($fileName) {
    $fileHandle = fopen($fileName, 'a');
    while (true) {
        fwrite($fileHandle, yield . "\n");
    }
}

$logger = logger(__DIR__ . '/log');
$logger->send('Foo');
$logger->send('Bar');

由于yield具有中断执行后再次调用又可以从中断处执行,外界又可以通过生成器对象(generator)的send方法进行交互,可以用于协程(coroutine),作多任务协作的流程控制。这里有个例子

<?php
class Task {
    protected $taskId;
    protected $coroutine;
    protected $sendValue = null;
    protected $beforeFirstYield = true;

    public function __construct($taskId, Generator $coroutine) {
        $this->taskId = $taskId;
        $this->coroutine = $coroutine;
    }

    public function getTaskId() {
        return $this->taskId;
    }

    public function setSendValue($sendValue) {
        $this->sendValue = $sendValue;
    }

    public function run() {
        if ($this->beforeFirstYield) {
            $this->beforeFirstYield = false;
            return $this->coroutine->current();
        } else {
            $retval = $this->coroutine->send($this->sendValue);
            $this->sendValue = null;
            return $retval;
        }
    }

    public function isFinished() {
        return !$this->coroutine->valid();
    }
}

class Scheduler {
    protected $maxTaskId = 0;
    protected $taskMap = []; // taskId => task
    protected $taskQueue;

    public function __construct() {
        $this->taskQueue = new SplQueue();
    }

    public function newTask(Generator $coroutine) {
        $tid = ++$this->maxTaskId;
        $task = new Task($tid, $coroutine);
        $this->taskMap[$tid] = $task;
        $this->schedule($task);
        return $tid;
    }

    public function schedule(Task $task) {
        $this->taskQueue->enqueue($task);
    }

    public function run() {
        while (!$this->taskQueue->isEmpty()) {
            $task = $this->taskQueue->dequeue();
            $task->run();

            if ($task->isFinished()) {
                unset($this->taskMap[$task->getTaskId()]);
            } else {
                $this->schedule($task);
            }
        }
    }
}
function task1() {
    for ($i = 1; $i <= 10; ++$i) {
        echo "This is task 1 iteration $i.\n";
        yield;
    }
}

function task2() {
    for ($i = 1; $i <= 5; ++$i) {
        echo "This is task 2 iteration $i.\n";
        yield;
    }
}

$scheduler = new Scheduler;

$scheduler->newTask(task1());
$scheduler->newTask(task2());

$scheduler->run();

有些任务是需要交互进行的,如socket的监听和回复;有些任务异步执行又需要回调,如A执行不阻塞程序,但B执行又取决于A是否执行完毕。这些都可以使用yield来进行封装,达到流程控制的目的。

参考链接:
Generators overview
What does yield mean in PHP?
What is the difference between a generator and an array?
Cooperative multitasking using coroutines (in PHP!)
What Generators Can Do For You
Generators and Coroutines in PHP
Generators in PHP
协程与yield
http://www.hitoy.org/coroutine-and-yield.html
Co-operative PHP Multitasking
Generator (computer programming)
异步处理在分布式系统中的优化作用

PHP异步IO

为了能更快的响应请求,耗时任务的执行不能阻塞当前脚本执行,而是放在最后执行,比如fastcgi_finsh_request。现在又多了一个方法,PHP也可以进行异步IO处理了。

PHP扩展eio是基于C语言的libeio库中开发的异步IO处理,可用于异步文件读写,自定义异步任务执行。Nodejs使用的libuv库封装了libeio和libev(libev也有对应的PHP扩展:ev),前者提供异步IO,后者提供高性能的事件驱动,进行高性能的请求的处理。另外,PHP异步多线程框架Swoole也提供了异步IO处理的能力。

在CentOS下编译安装PHP eio扩展:

wget https://pecl.php.net/get/eio-1.2.5.tgz
tar -zxvf eio-1.2.5.tzg
cd eio-1.2.5
phpize
./configure
sudo make
sudo make install

更改php.ini添加扩展

[eio]
extension=eio.so

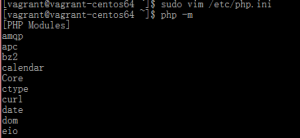
查看是否安装成功
eio0
注意:eio扩展必须在socket扩展之后加载,否则会提示’ undefined symbol: php_sockets_le_socket in Unknown on line 0’。

PHP eio支持libeio的所有操作,当调用eio_poll/eio_event_loop时,触发IO处理,处理完成进行回调;未主动调用eio_poll/eio_event_loop则不阻塞当前程序执行,等待脚本执行结束后在提交异步处理。使用eio_customeio_nop可以自定义异步任务调用。

以下以写文件进行比较,示例一是常规的文件写操作:

$strBasePath = dirname(__FILE__);
$strFileName = $strBasePath.'/file.log';
$strContent = 'something to log ...';

$nStart = microtime(true);
$rFile = fopen($strFileName ,'a+');
for($i=0;$i<1000;$i++){
	$nLength = fwrite($rFile, $strContent);
}
fclose($rFile);
echo "done\r\n";

register_shutdown_function(function(){
	global $nStart;
	echo microtime(true) - $nStart;
	echo "\r\n";
});

示例二是PHP eio的异步写操作:

$strBasePath = dirname(__FILE__);
$strFileName = $strBasePath.'/file.log';
$strContent = 'something to log ...';
$nLenth = strlen($strContent);

function eioOpenCallBack($p_mxData ,$p_mxResult){
	//echo "Open.\r\n";
	if ($p_mxResult > 0) {
		eio_fstat($p_mxResult, EIO_PRI_DEFAULT, "eioStatCallBack", $p_mxResult);
	}
}
function eioStatCallBack($p_mxData ,$p_mxResult){
	global $strContent ,$nLenth;
	//echo "Stat.\r\n";
	if ($p_mxResult > 0) {
		eio_write($p_mxData, $strContent, $nLenth, $p_mxResult['size'], EIO_PRI_DEFAULT, "eioWriteCallBack", $p_mxData);
	}
}
function eioWriteCallBack($p_mxData ,$p_mxResult){
	//echo "Write.\r\n";
	if ($p_mxResult > 0) {
		eio_close($p_mxData, EIO_PRI_DEFAULT, "eioCloseCallBack", $p_mxData);
	}
}
function eioCloseCallBack($p_mxData ,$p_mxResult){
	//echo "Close.\r\n";
	if($p_mxResult == 0){
		//echo "End\r\n";
	}
}

$nStart = microtime(true);
for($i=0;$i<1000;$i++){
	eio_open($strFileName, EIO_O_CREAT | EIO_O_RDWR, EIO_S_IRUSR | EIO_S_IWUSR,EIO_PRI_DEFAULT, "eioOpenCallBack", $strFileName);
	
	//echo "Begin\r\n";
	
	//eio_event_loop();
}
echo "done\r\n";
register_shutdown_function(function(){
	global $nStart;
	echo microtime(true) - $nStart;
	echo "\r\n";
});

示例三是swoole扩展的异步写操作

$strBasePath = dirname(__FILE__);
$strFileName = $strBasePath.'/file.log';
$strContent = 'something to log ...';

$nStart = microtime(true);
for($i=0;$i<1000;$i++){
	swoole_async_write($strFileName ,$strContent);
}
echo "done\r\n";
register_shutdown_function(function(){
	global $nStart;
	echo microtime(true) - $nStart;
	echo "\r\n";
});

对比情况
eio1
可以看出,eio和swoole提交异步IO处理后,处理非常快,并未阻塞当前进程运行;eio更像是只花了循环的时间。swoole只能运行于CLI模式,使用了Linux Native AIO,处理非常快,写法也比较简单。eio可以运行于CGI和CLI模式,提交异步处理后会创建至多4个线程(eio_nthreads)进行处理,处理完成后仍然会返回主线程,所以PHP脚本执行结束后,主线程仍然会在在那里等待。eio的异步处理通过回调进行保证,写法上更加复杂。这就需要对异步回调进行包装,提供类似同步的代码,参见协程

参考链接:
PHP异步执行长时间任务
PHP的生命周期
libeio源码学习
PHP新增eio扩展,可以写类似node.js一样的异步IO了
深入浅出Node.js(五):初探Node.js的异步I/O实现
异步AIO的研究
关于C10K、异步回调、协程、同步阻塞
协程
linux AIO (异步IO) 那点事儿
什么程序设计语言机制是处理异步 IO 最恰当的抽象?
nodejs异步IO的实现
向facebook学习,通过协程实现mysql查询的异步化
Python 中的进程、线程、协程、同步、异步、回调
一个“蝇量级” C 语言协程库

CentOS上安装Nginx+PHP-FPM

Nginx是一个高性能、轻量级的HTTP服务器,占用内存少,稳定性高,也可做为反向代理服务器。Nginx采用事件驱动,在Linux操作系统下,Nginx使用epoll事件模型,充分使用异步逻辑,削减了上下文调度开销,并发服务能力更强。

PHP-FPM是PHP的FastCGI 进程管理器,具有一些高级特性,将PHP进程管理与Web服务器分开,可以分开部署在不同机器上,监听不同的端口和使用不同的 php.ini 配置文件。

PHP-FPM特性之一:fastcgi_finish_request能够在请求完成和刷新数据后,继续在后台执行耗时的工作(录入视频转换、统计处理等),达到分离执行后台任务而又不阻塞PHP快速响应,可作为PHP性能优化点。

PHP-FPM另一特性:可以记录请求当中慢响应的日志,类似Mysql满日志,包括文件名,函数名,行号等,可用于分析PHP的性能问题。

在Apache + mod_php下,每一个请求,Apache便会启动一个进程并加载php解释器来处理。在Nginx + PHP-FPM下,Nginx将PHP请求和环境变量通过socket传递给FastCGI进程;将静态资源请求则缓存到本地并返回。FastCGI 进程管理器采用固定静态(或动态)的子进程来处理请求,占用内存少,具有更好的扩展能力。

在CentOs 6.4上安装Nginx和PHP-FPM:

yum search nginx
sudo yum install nginx
sudo chkconfig --levels 235 nginx on
sudo service nginx start

yum search fpm
sudo yum install php54-fpm

编辑php.ini

sudo vim /etc/php.ini
; cgi.fix_pathinfo provides *real* PATH_INFO/PATH_TRANSLATED support for CGI.  PHP's
; previous behaviour was to set PATH_TRANSLATED to SCRIPT_FILENAME, and to not grok
; what PATH_INFO is.  For more information on PATH_INFO, see the cgi specs.  Setting
; this to 1 will cause PHP CGI to fix its paths to conform to the spec.  A setting
; of zero causes PHP to behave as before.  Default is 1.  You should fix your scripts
; to use SCRIPT_FILENAME rather than PATH_TRANSLATED.
; http://www.php.net/manual/en/ini.core.php#ini.cgi.fix-pathinfo
cgi.fix_pathinfo=0

启动PHP-FPM

chkconfig --levels 235 php-fpm on
service php-fpm start

更改Nginx worker_processes配置

sudo vim /etc/nginx/nginx.conf
worker_processes  4;

更改Nginx 配置以便处理php请求

sudo vim /etc/nginx/conf.d/default.conf
server {
    listen       80 default_server;
    server_name  _;

    #charset koi8-r;

    #access_log  logs/host.access.log  main;

    # Load configuration files for the default server block.
    include /etc/nginx/default.d/*.conf;

    location / {
        root   /usr/share/nginx/html;
        index  index.html index.htm;
    }

    error_page  404              /404.html;
    location = /404.html {
        root   /usr/share/nginx/html;
    }

    # redirect server error pages to the static page /50x.html
    #
    error_page   500 502 503 504  /50x.html;
    location = /50x.html {
        root   /usr/share/nginx/html;
    }

    # proxy the PHP scripts to Apache listening on 127.0.0.1:80
    #
    #location ~ \.php$ {
    #    proxy_pass   http://127.0.0.1;
    #}

    # pass the PHP scripts to FastCGI server listening on 127.0.0.1:9000
    #
    location ~ \.php$ {
        root           /usr/share/nginx/html;
        #fastcgi_pass   127.0.0.1:9000;
        fastcgi_pass   unix:/tmp/php5-fpm.sock;
        fastcgi_index  index.php;
        fastcgi_param  SCRIPT_FILENAME  /scripts$fastcgi_script_name;
        include        fastcgi.conf;
    }

    # deny access to .htaccess files, if Apache's document root
    # concurs with nginx's one
    #
    #location ~ /\.ht {
    #    deny  all;
    #}
}

编辑PHP-FPM

sudo vim /etc/php-fpm.d/www.conf
; List of ipv4 addresses of FastCGI clients which are allowed to connect.
; Equivalent to the FCGI_WEB_SERVER_ADDRS environment variable in the original
; PHP FCGI (5.2.2+). Makes sense only with a tcp listening socket. Each address
; must be separated by a comma. If this value is left blank, connections will be
; accepted from any ip address.
; Default Value: any
;listen.allowed_clients = 127.0.0.1
listen = /tmp/php5-fpm.sock

; Set permissions for unix socket, if one is used. In Linux, read/write
; permissions must be set in order to allow connections from a web server. Many
; BSD-derived systems allow connections regardless of permissions.
; Default Values: user and group are set as the running user
;                 mode is set to 0660
listen.owner = nginx
listen.group = nginx
listen.mode = 0660

; Unix user/group of processes
; Note: The user is mandatory. If the group is not set, the default user's group
;	will be used.
; RPM: apache Choosed to be able to access some dir as httpd
user = nginx
; RPM: Keep a group allowed to write in log dir.
group = nginx

重启PHP-FPM

sudo service php-fpm restart

创建PHP页面

sudo vim /usr/share/nginx/html/info.php
<?php
phpinfo();

重启Nginx

sudo service nginx restart

测试PHP是否正确处理。
php-fpm

参考链接:
Nginx and PHP-FPM Configuration and Optimizing Tips and Tricks
nginx
FastCGI 进程管理器(FPM)
Apache + mod_php compared to Nginx + php-fpm
Which PHP mode? Apache vs CGI vs FastCGI
PHP: What are the advantages of FastCGI over mod_php?
What are the advantages of using PHP-FPM + Nginx over Apache and mod_php?
How To Install Nginx With PHP5 (And PHP-FPM) And MySQL Support On CentOS 6.5
How To Install Linux, nginx, MySQL, PHP (LEMP) stack on CentOS 6
Linux上配置Nginx+PHP5(FastCGI)
使用fastcgi_finish_request提高页面响应速度
善用php-fpm的慢执行日志slow log,分析php性能问题
swoole之代码热更新实现